Here’s what you have to do in order to enable the GCM service for your project:
Locate your Google Project Number 
The Project Number is automatically assigned by the Google Developers Console when you create a project. You can find the Project Number in the “Overview” tab of the Google API console.
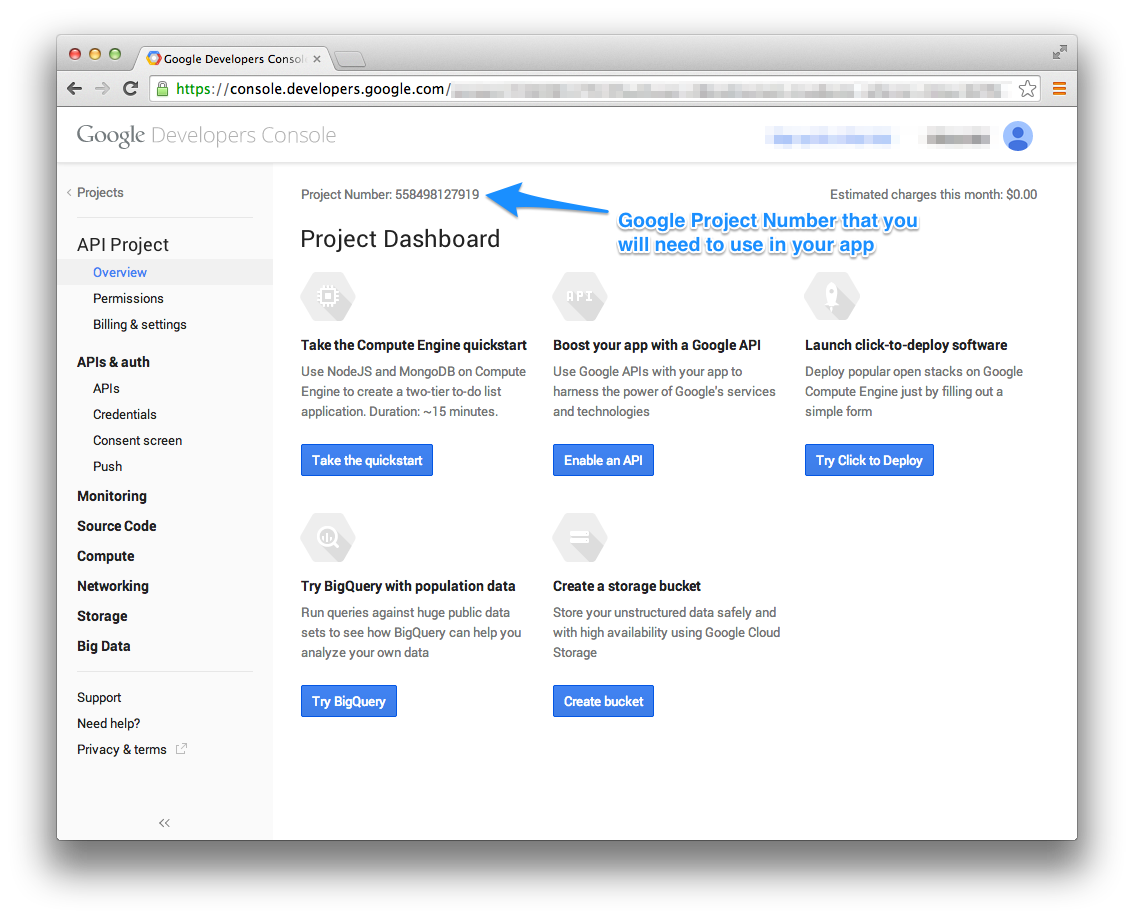
Here, 558498127919 is the Project Number you enter in the app. Don’t confuse it with Project ID, which is a completely different identifier & is used only within Developers Console!
Enable GCM and Get Credentials
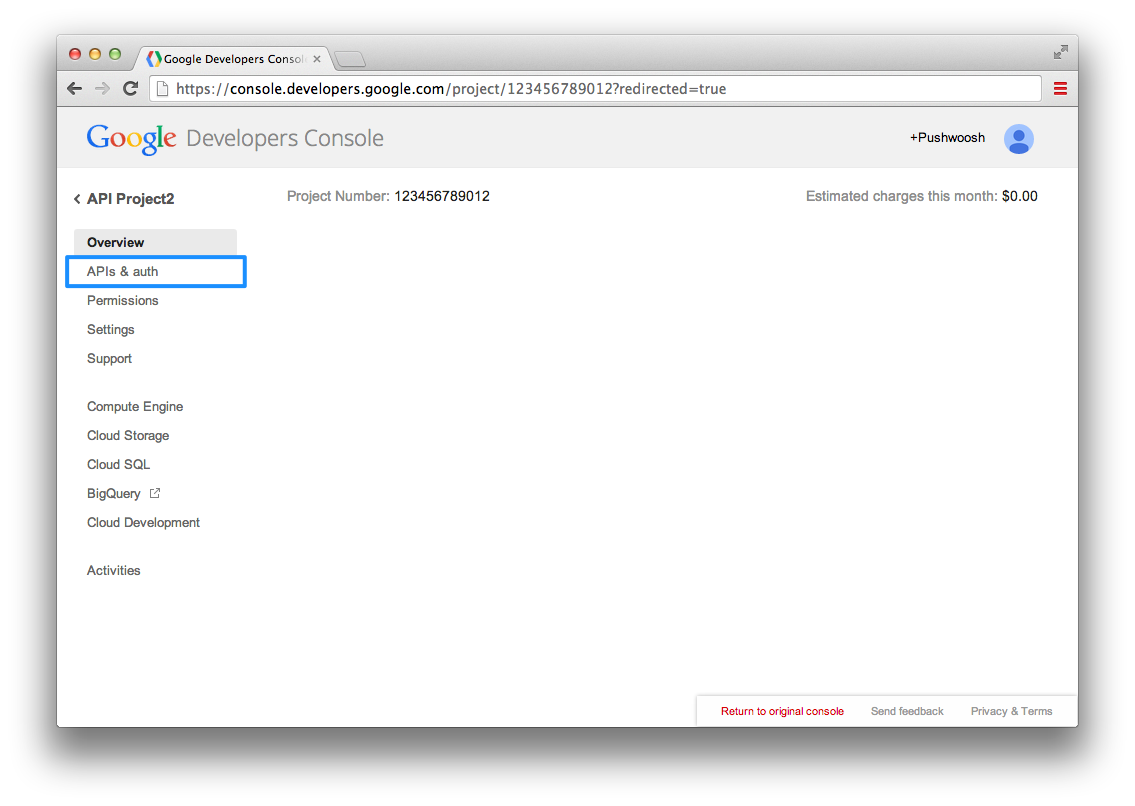
1. In the main Google APIs Console page, select APIs & auth. ![]()
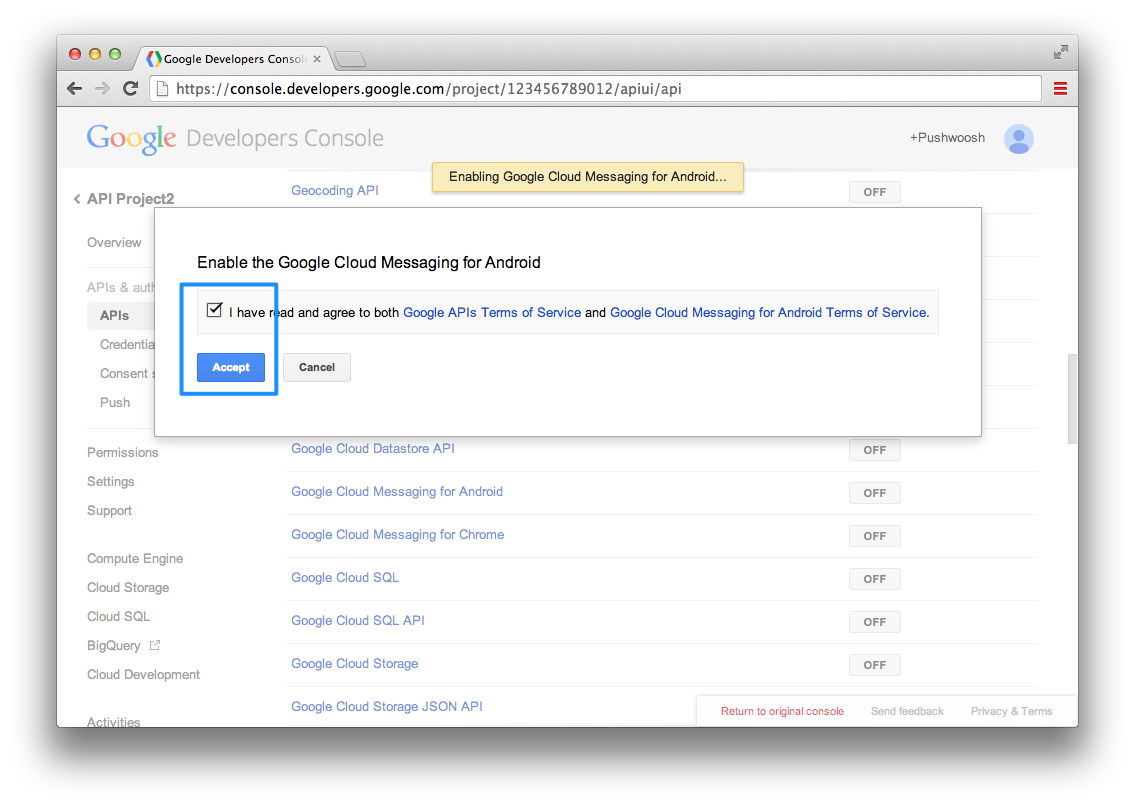
2. Locate Google Cloud Messaging for Android, and turn the toggle ON. ![]()

3. Accept the Terms of Service. ![]()
Now you need to create the Server Key.
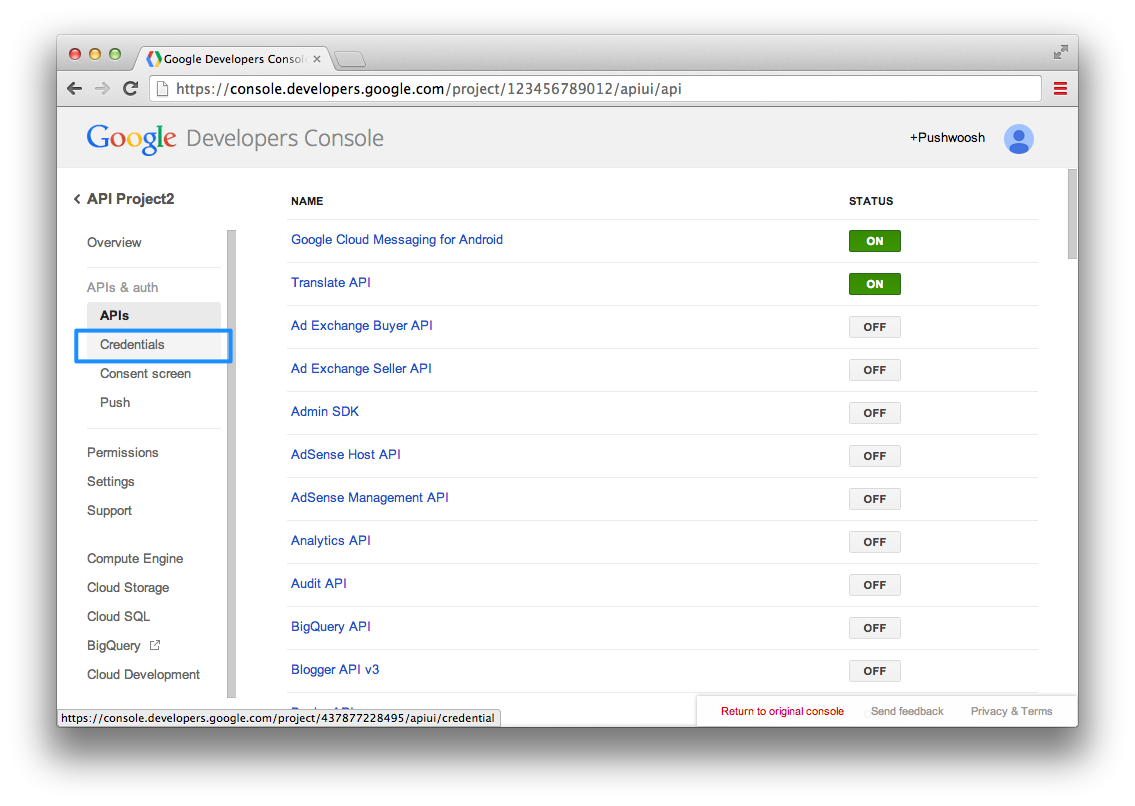
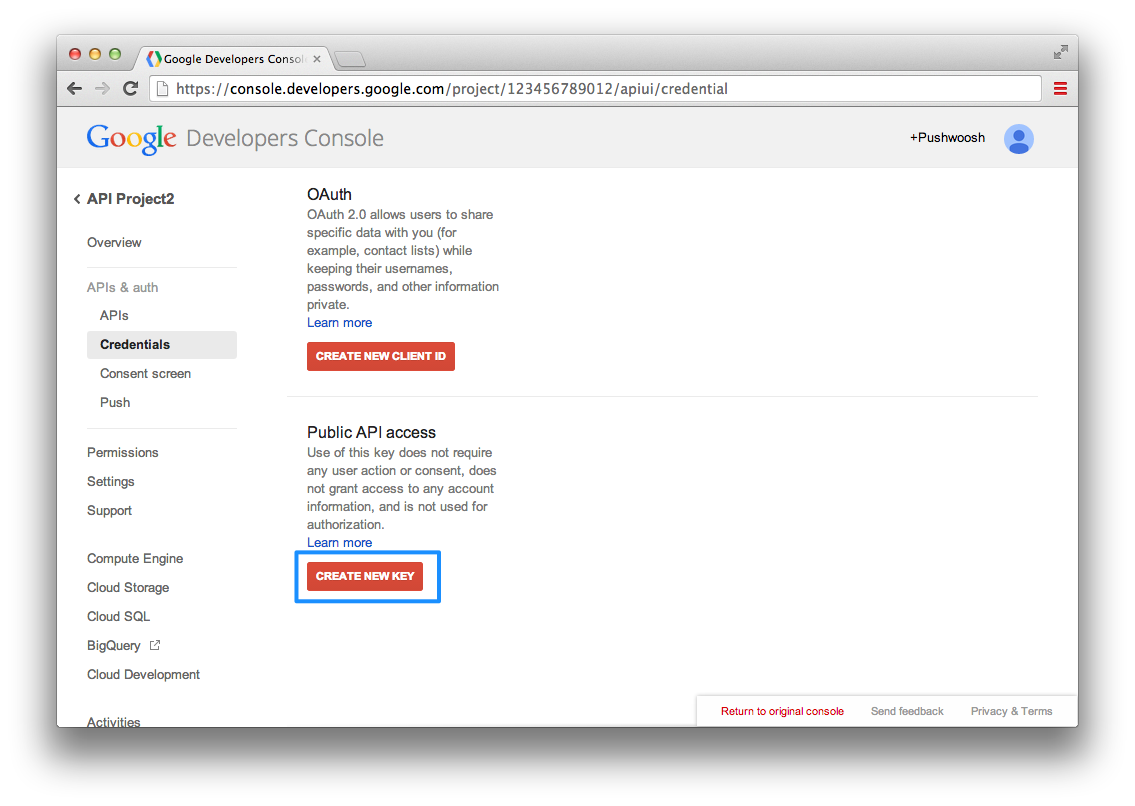
4. Go to the Credential section of the console. ![]()
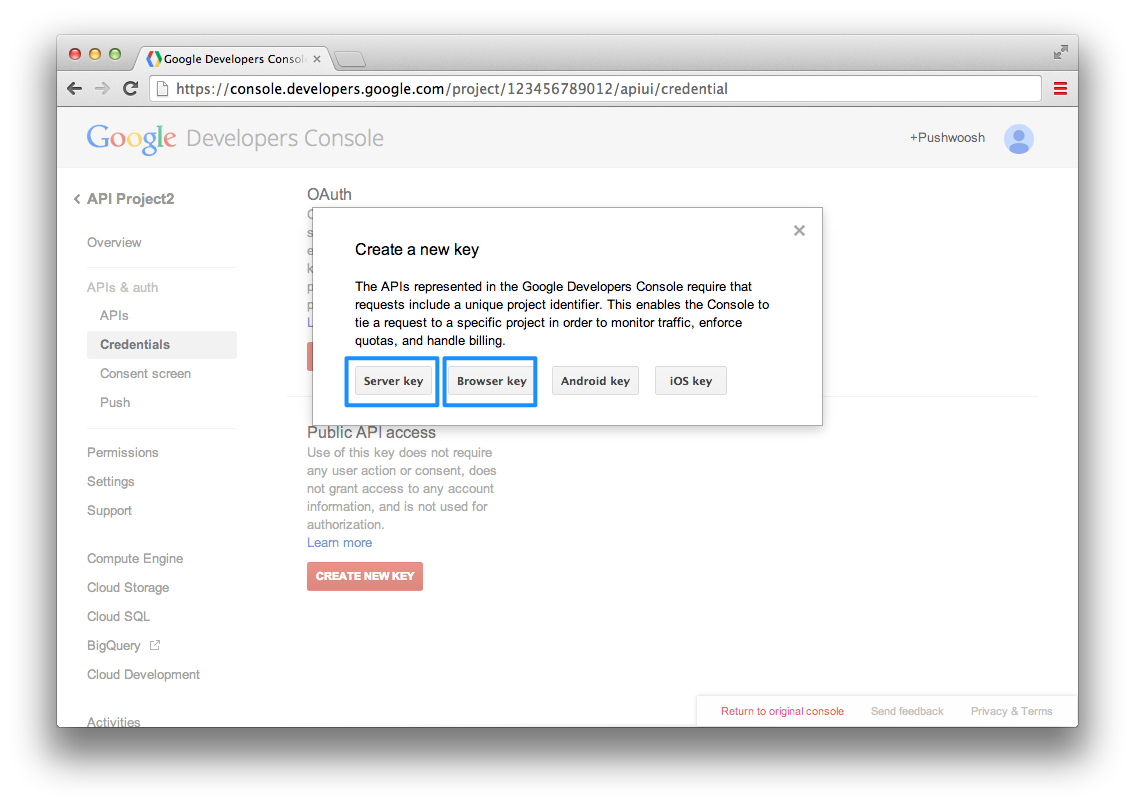
5. Press “Create new key“. Either a server key or a browser key should work. The advantage to using a server key is that it allows you to whitelist IP addresses. ![]()
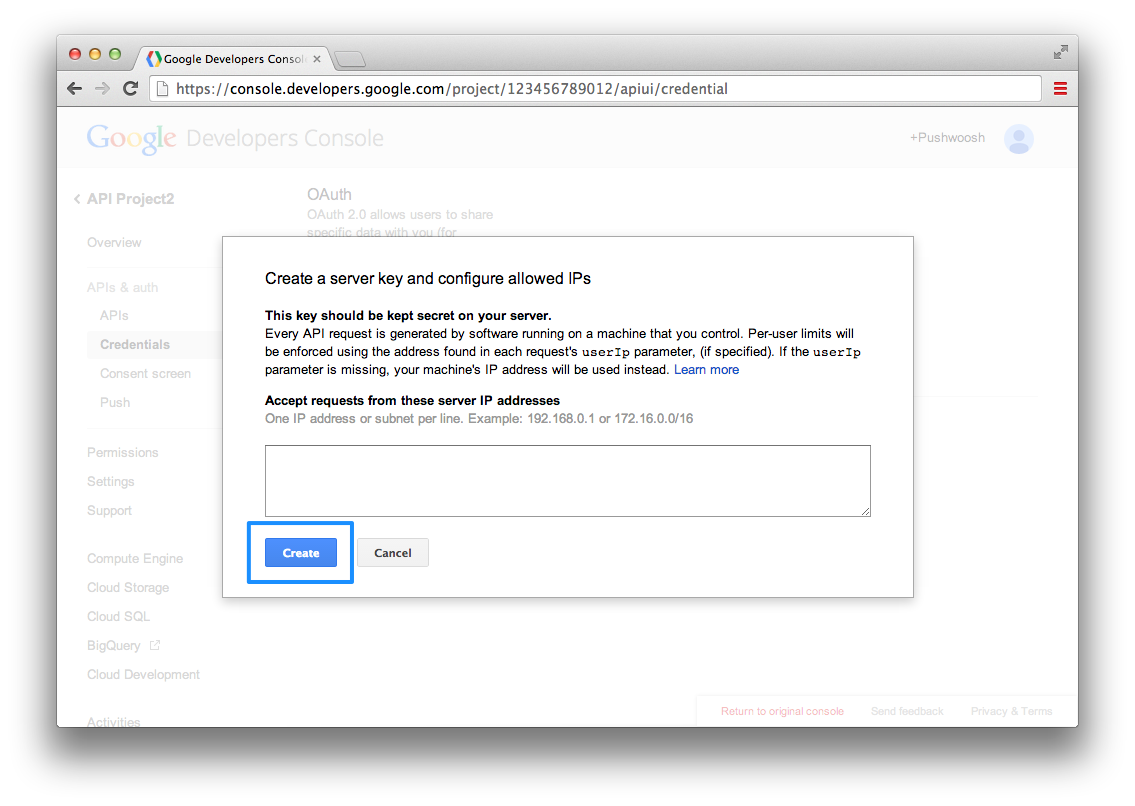
6. Press “Create”. ![]()
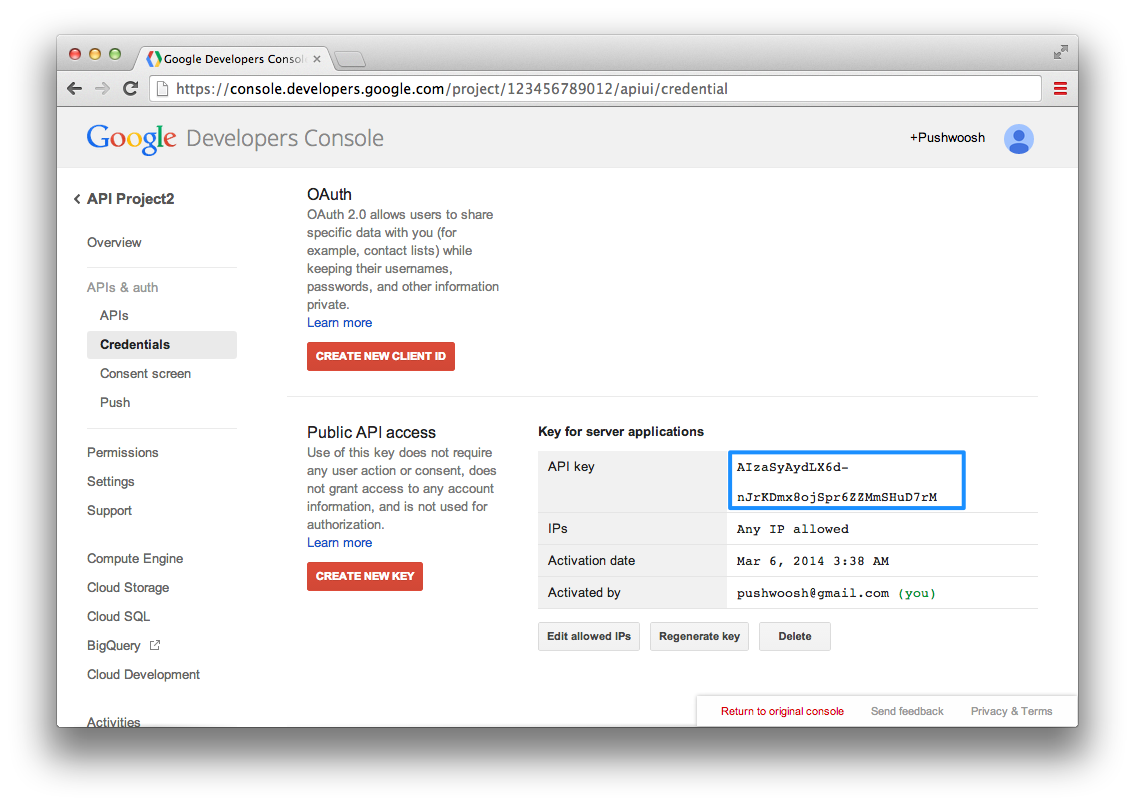
7. Here’s the API Key you will need to configure your application in Pushwoosh Control Panel. ![]()
Go to the Pushwoosh Control Panel
8. In your application click on Android->Edit to change the configuration for Android application. ![]()
9. Copy your API Key to the field provided. ![]()

That’s it! Easy, isn’t it?