How to convert free app users into paid subscribers: A strategy for mobile apps
Attracting free users is just the beginning; the real challenge lies in converting those users into paid subscribers, an essential step for increasing LTV and driving revenue. Whether you’re aiming to convert users after a free trial or within a freemium app model, random efforts can do more harm than good to your ROI. Instead, you need a well-defined strategy based on automated communications and audience segmentation. Keep reading to discover tips for implementing such a strategy for your app.
How to convert users to paid subscribers after a free trial
The answer is simple: provide users with a snapshot of your app’s value, which they’ll unlock with a paid subscription. Here are the components that can help convey this value.
Create an effective onboarding experience
- Prompt users to create an account early on
This step not only secures user progress but also ensures an additional channel for communication through email, making it easier to re-engage users and renew your conversion efforts later.
To automate your sign-up communication, try using a campaign mapping tool. Here’s an example of a messaging flow created with Pushwoosh Customer Journey Builder. A new user receives an in-app welcome message, followed by another in-app prompting them to complete an account registration form:

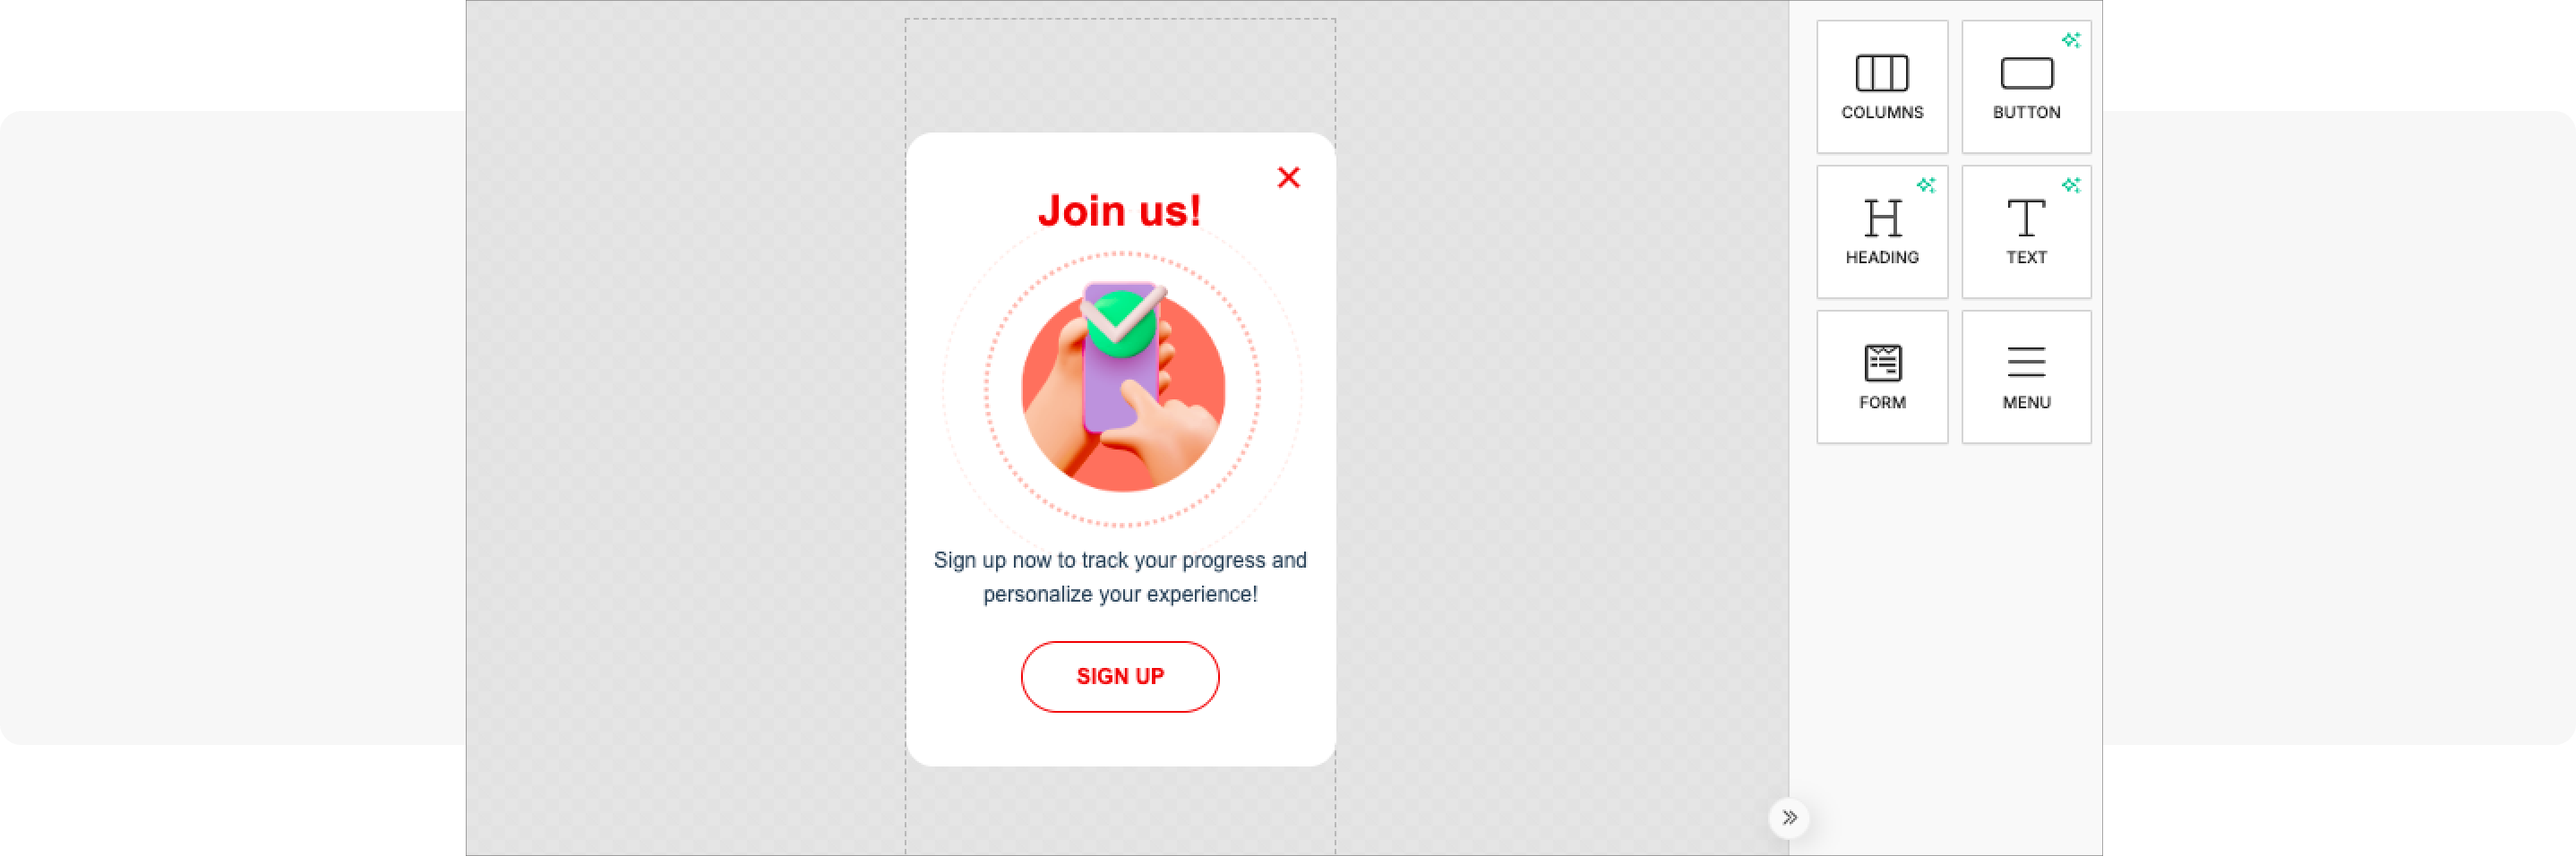
You can create in-app messages for this flow directly in Pushwoosh’s No-code in-app editor. It offers pre-designed templates you can use immediately, launching your campaign in seconds. Here is a template for an account registration prompt:
- Collect data about user motivation. By asking questions about user interests and goals relating to the app, you can personalize their trial to highlight features that resonate with them the most.
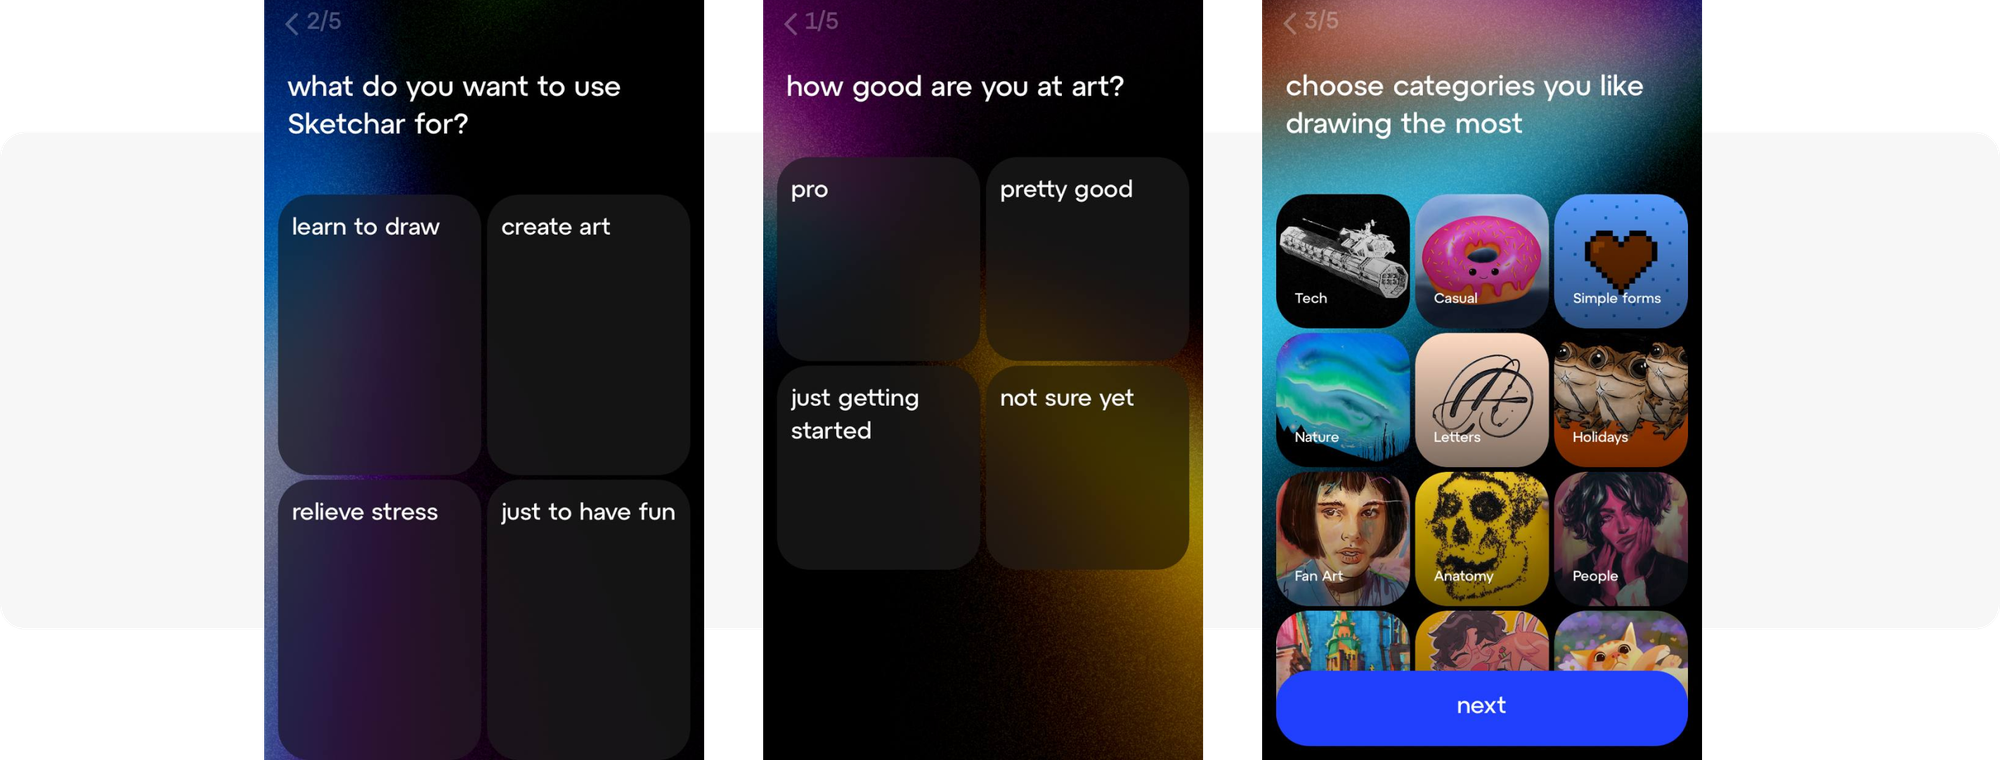
Here’s a glimpse into the onboarding flow from the Sketchar drawing app. It guides users through a survey to create a profile based on their answers:
An in-app survey can easily be created via a template in the Pushwoosh in-app editor. You can take the template and customize it for your brand with intuitive drag-and-drop elements:

Form an engaging habit
Throughout the trial, try sending users a daily feature highlight. This not only keeps users exploring the app but also helps them build a habit of tapping the app’s icon regularly.
By integrating your app into users’ routines, you increase the chances they’ll recognize its value and be ready to upgrade to a paid subscription once the trial ends.
Here’s how the flow for this scenario will look on the Pushwoosh Customer Journey Builder:

For this flow, you’ll need two communication channels–push notifications and email. Fortunately, in Pushwoosh, all channels are managed from a single platform, making it easy to launch omnichannel and cross-channel campaigns.
Wrap up the trial experience and reinforce value
As the trial period ends, it’s crucial to recap the value users have gained and demonstrate how the app can continue to meet their needs.
Send them an in-app message one day before the trial ends, summarizing the benefits they’ve experienced and highlighting key features they may not have fully explored yet:

To target trial users, this journey uses event data from Qonversion–a platform that tracks users’ conversion status data. With the Qonversion integration, Pushwoosh receives data directly from the platform, allowing you to skip event setup and immediately put the data to use in your campaigns.
After the trial: Keep engaging hesitant users
You’ve put in the effort to onboard and engage users, but some may still be on the fence after the trial. Identify these users, as they could still be open to engagement through targeted push notifications.
In Customer Journey Builder, use the ‘Wait for Trigger’ element, which enables you to split communication paths based on user behavior.
If users trigger the ‘SubscriptionActivated’ event, they will exit the flow and be tagged as paid subscribers. If not, you can continue engaging them through push notifications to encourage conversion later on:
💡For iOS devices, this journey requires some adjustments. Since Apple automatically transitions users to a paid plan at the end of their trial, the key trigger event will be when a user cancels their subscription.
How to convert freemium app users
To successfully convert free users, direct your efforts toward those with the highest conversion potential, which you can uncover through audience segmentation. You have a few segmentation options to pick from.
1.Segment by behavior
What better reflects your opportunities to upgrade users than their behavior? All you need to do is tailor your communication to the actions they’ve taken.
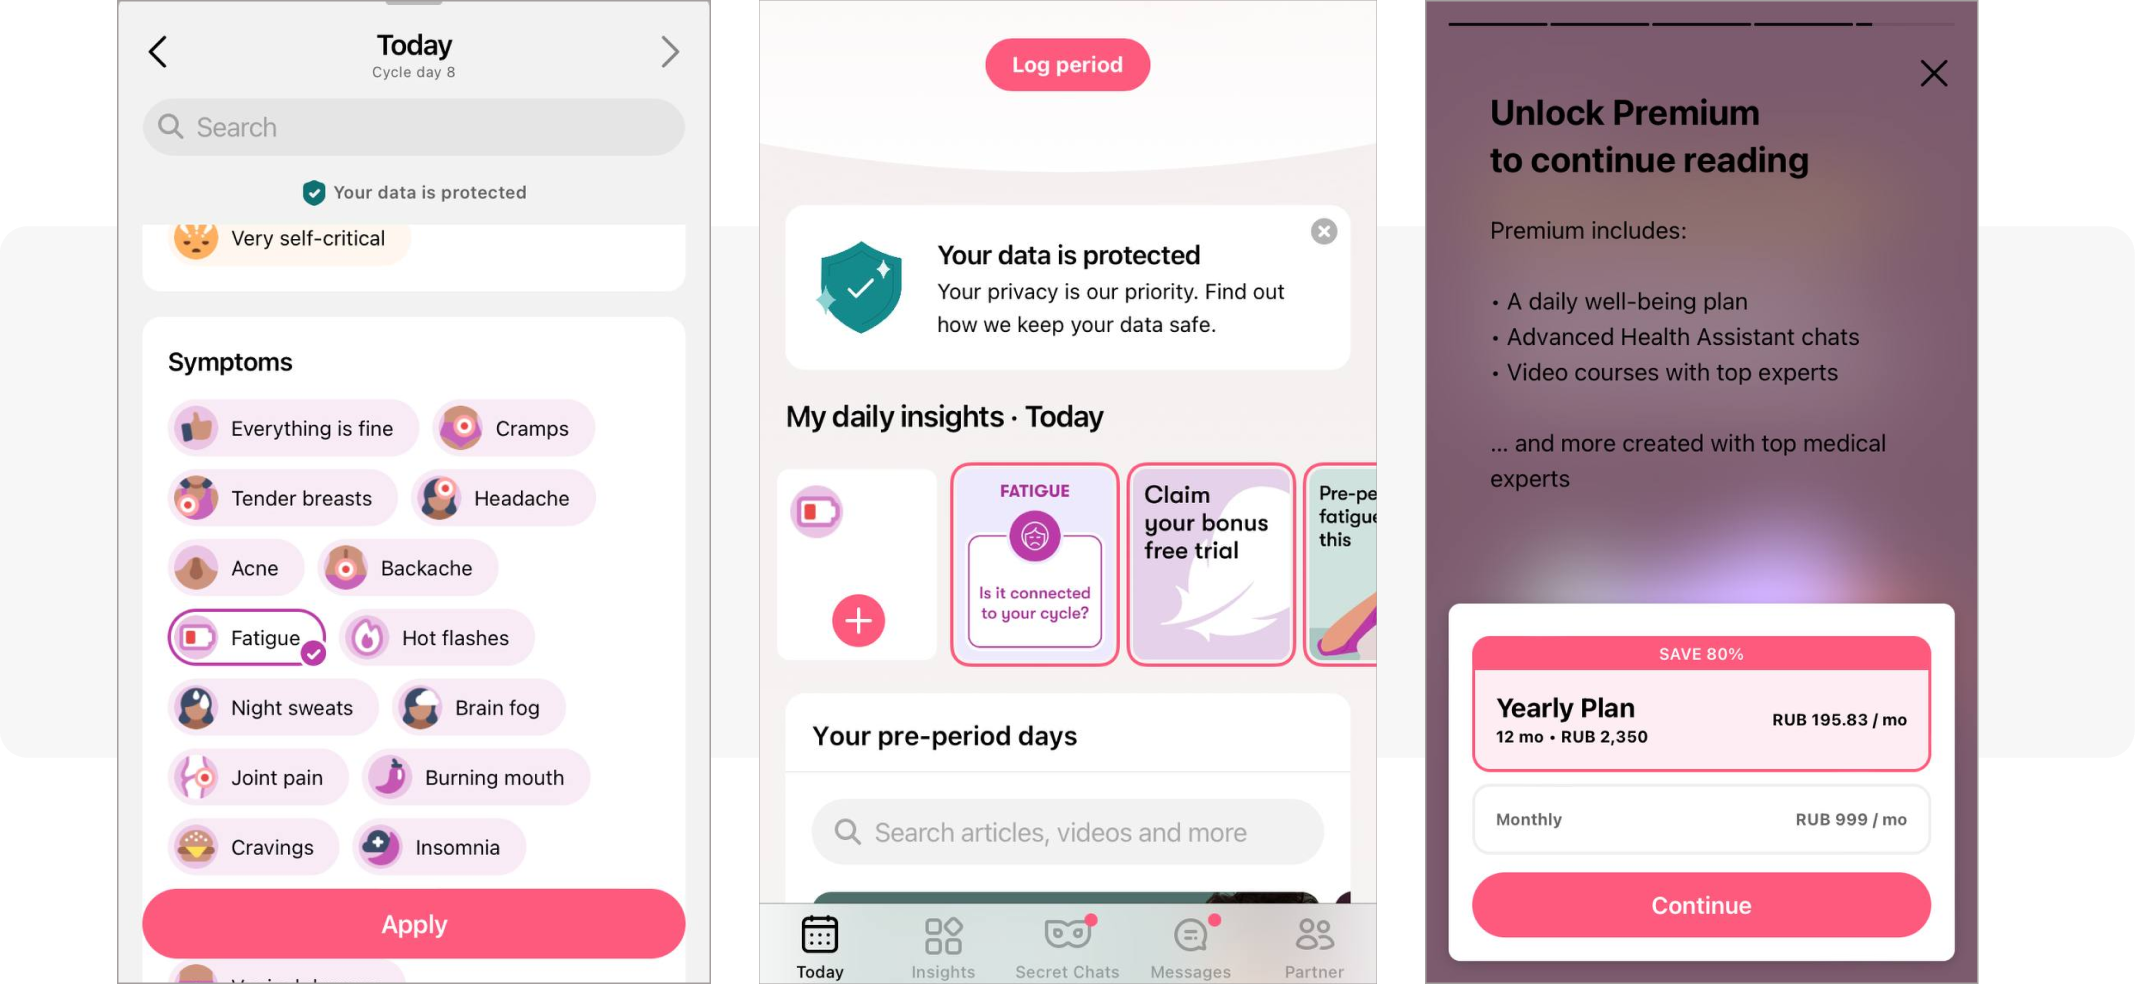
For example, in the Flo app, when a user logs “Fatigue” as a symptom, a related article appears in the “Daily Insights” section. If the user clicks on this suggestion, an in-app message prompts them to upgrade to continue reading:
You can create a similar automated flow, enhancing it by utilizing various communication channels:
1️⃣ Target all free users: launch your campaign reaching out to your entire base of free users;
2️⃣ Track events: wait until they perform a specific action or view a specific screen that indicates interest;
3️⃣ Present an upgrade offer: display an in-app message with an upgrade offer.
4️⃣ Use push notifications: if users haven’t upgraded after viewing the in-app message, send them a push notification encouraging them to consider the upgrade;
5️⃣ Provide detailed information: if they click on the push notification, follow up with an in-app message that provides more details about the benefits of upgrading;
6️⃣ Follow up via email: if users don’t interact with the push notification, send an upgrade offer via email to re-engage them.
2.Segment by behavior + user/device data
To get the most out of your conversion campaigns, try mixing different segmentation criteria. For example, you can match event-based segmentation with user or device attributes.
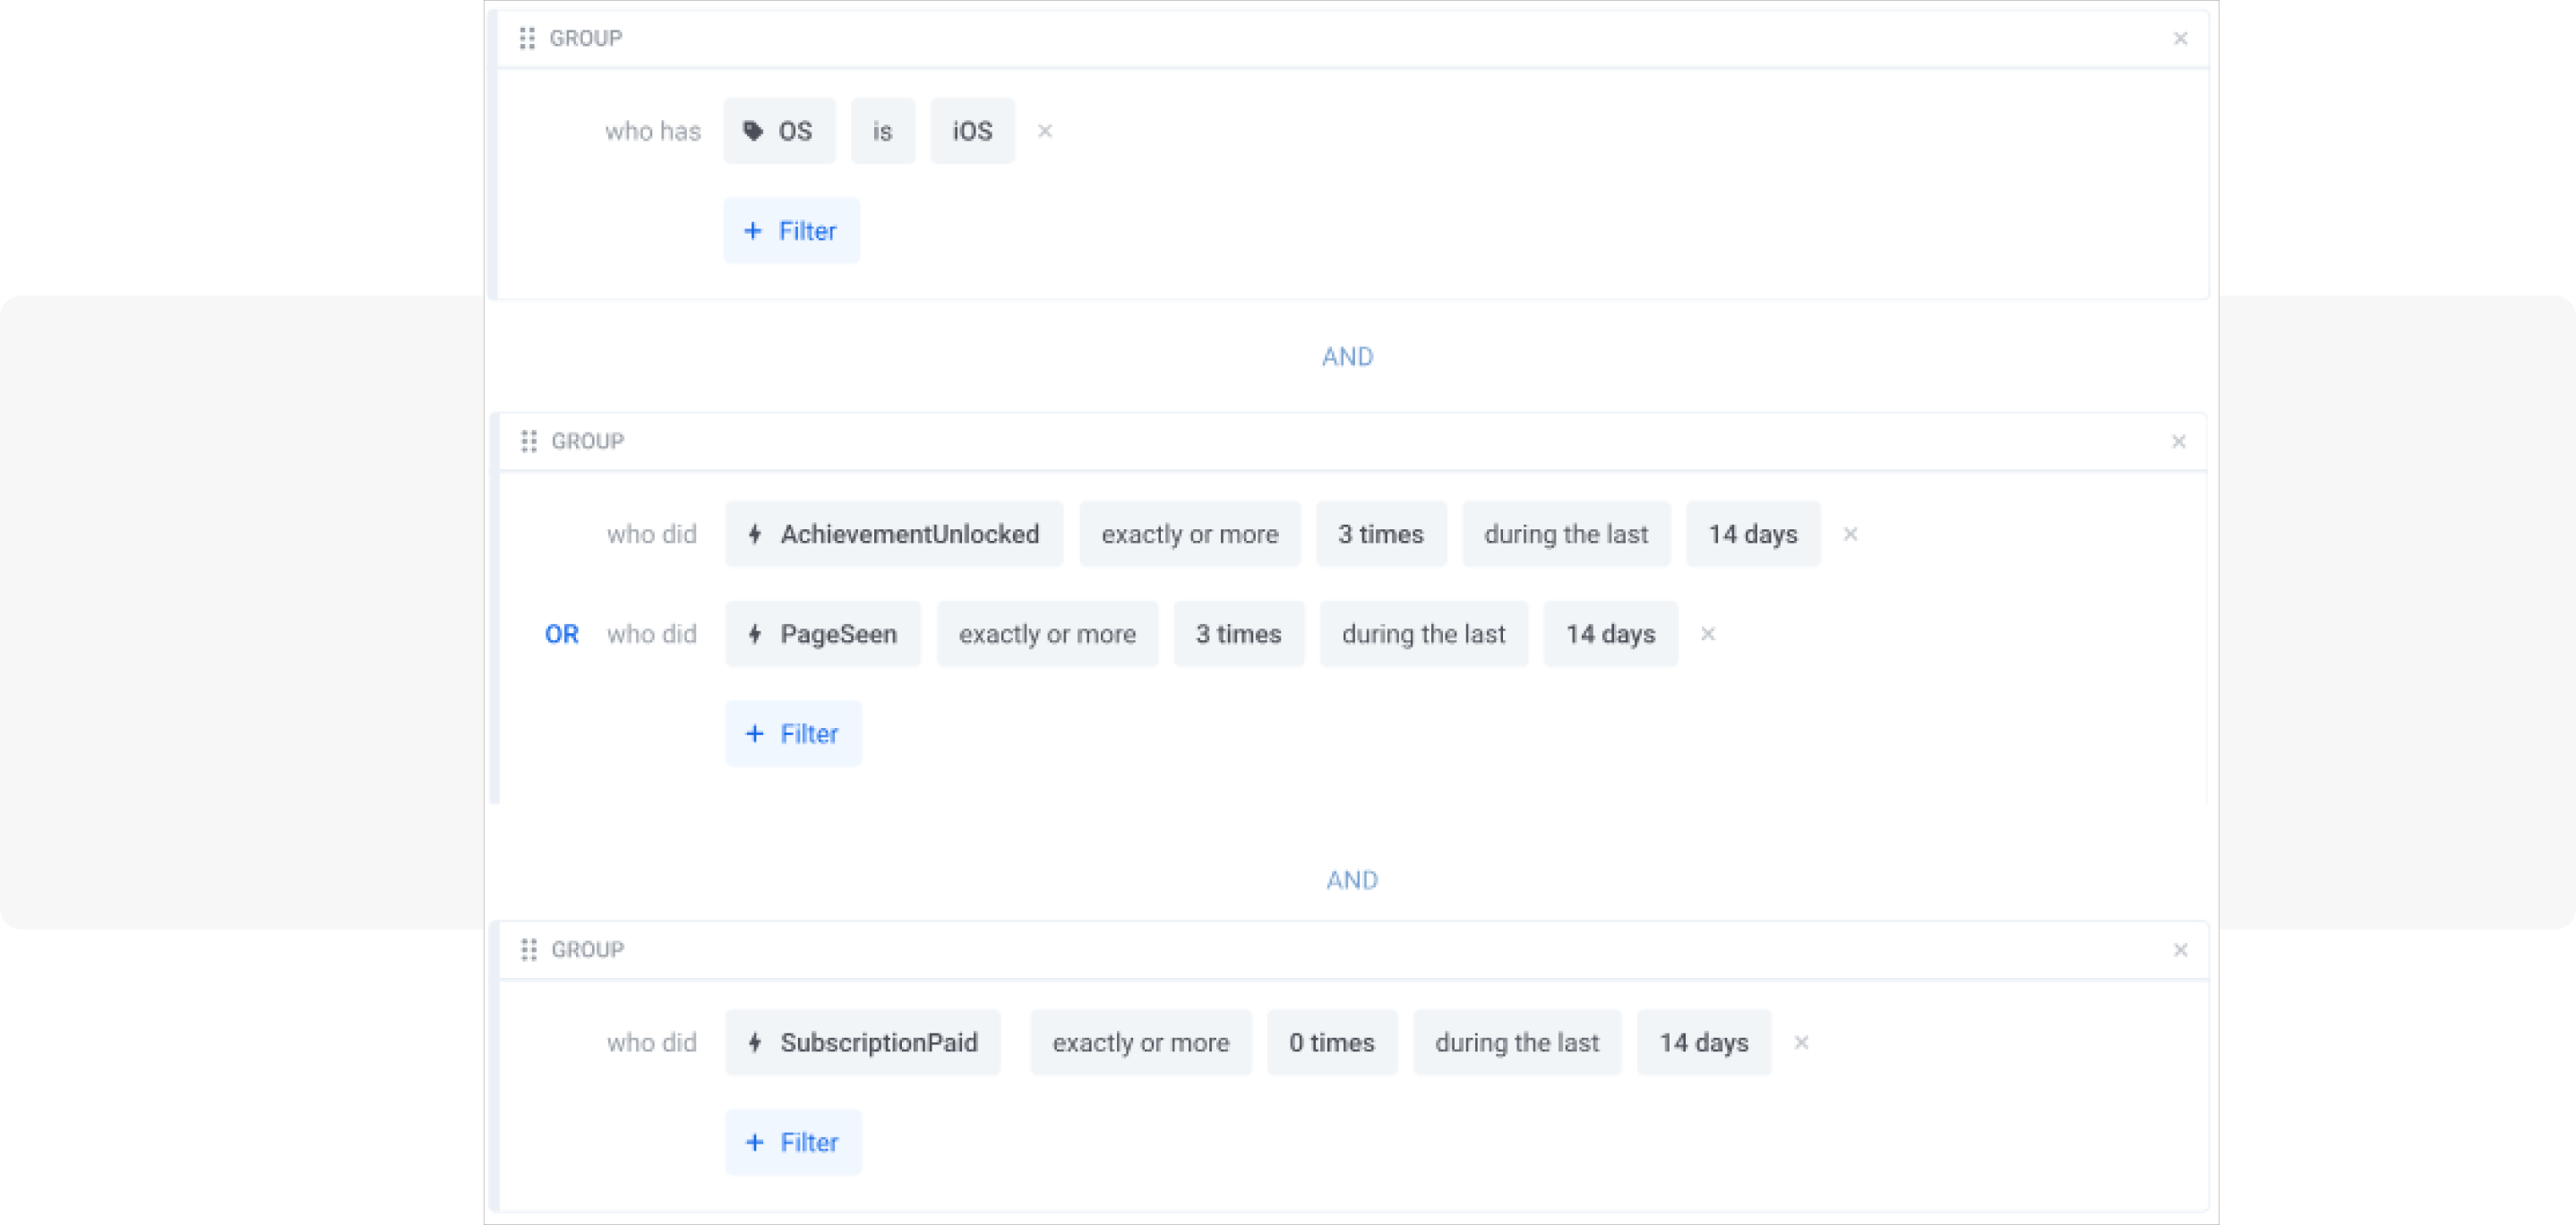
With Pushwoosh’s advanced segmentation tool, you can combine these factors for a hyper-targeted approach.
For instance, here’s a complex segment with a high potential for conversion to paid users: iOS users who’ve unlocked an achievement or viewed a specific page at least three times in the past 14 days but haven’t yet subscribed. This precise segment lets you reach out to engaged users right when they’re most interested in an upgrade:
3.Target the most engaged of RFM segments
The RF grid is an adaptation of the classic RFM segmentation, tailored specifically for apps where the key actions are using features and viewing content.
Unlike the traditional RFM analysis that considers customers’ monetary value, RF segmentation is based on Recency and Frequency metrics alone. This makes it ideal for freemium apps aiming to identify users who are most likely to convert to a paid plan:
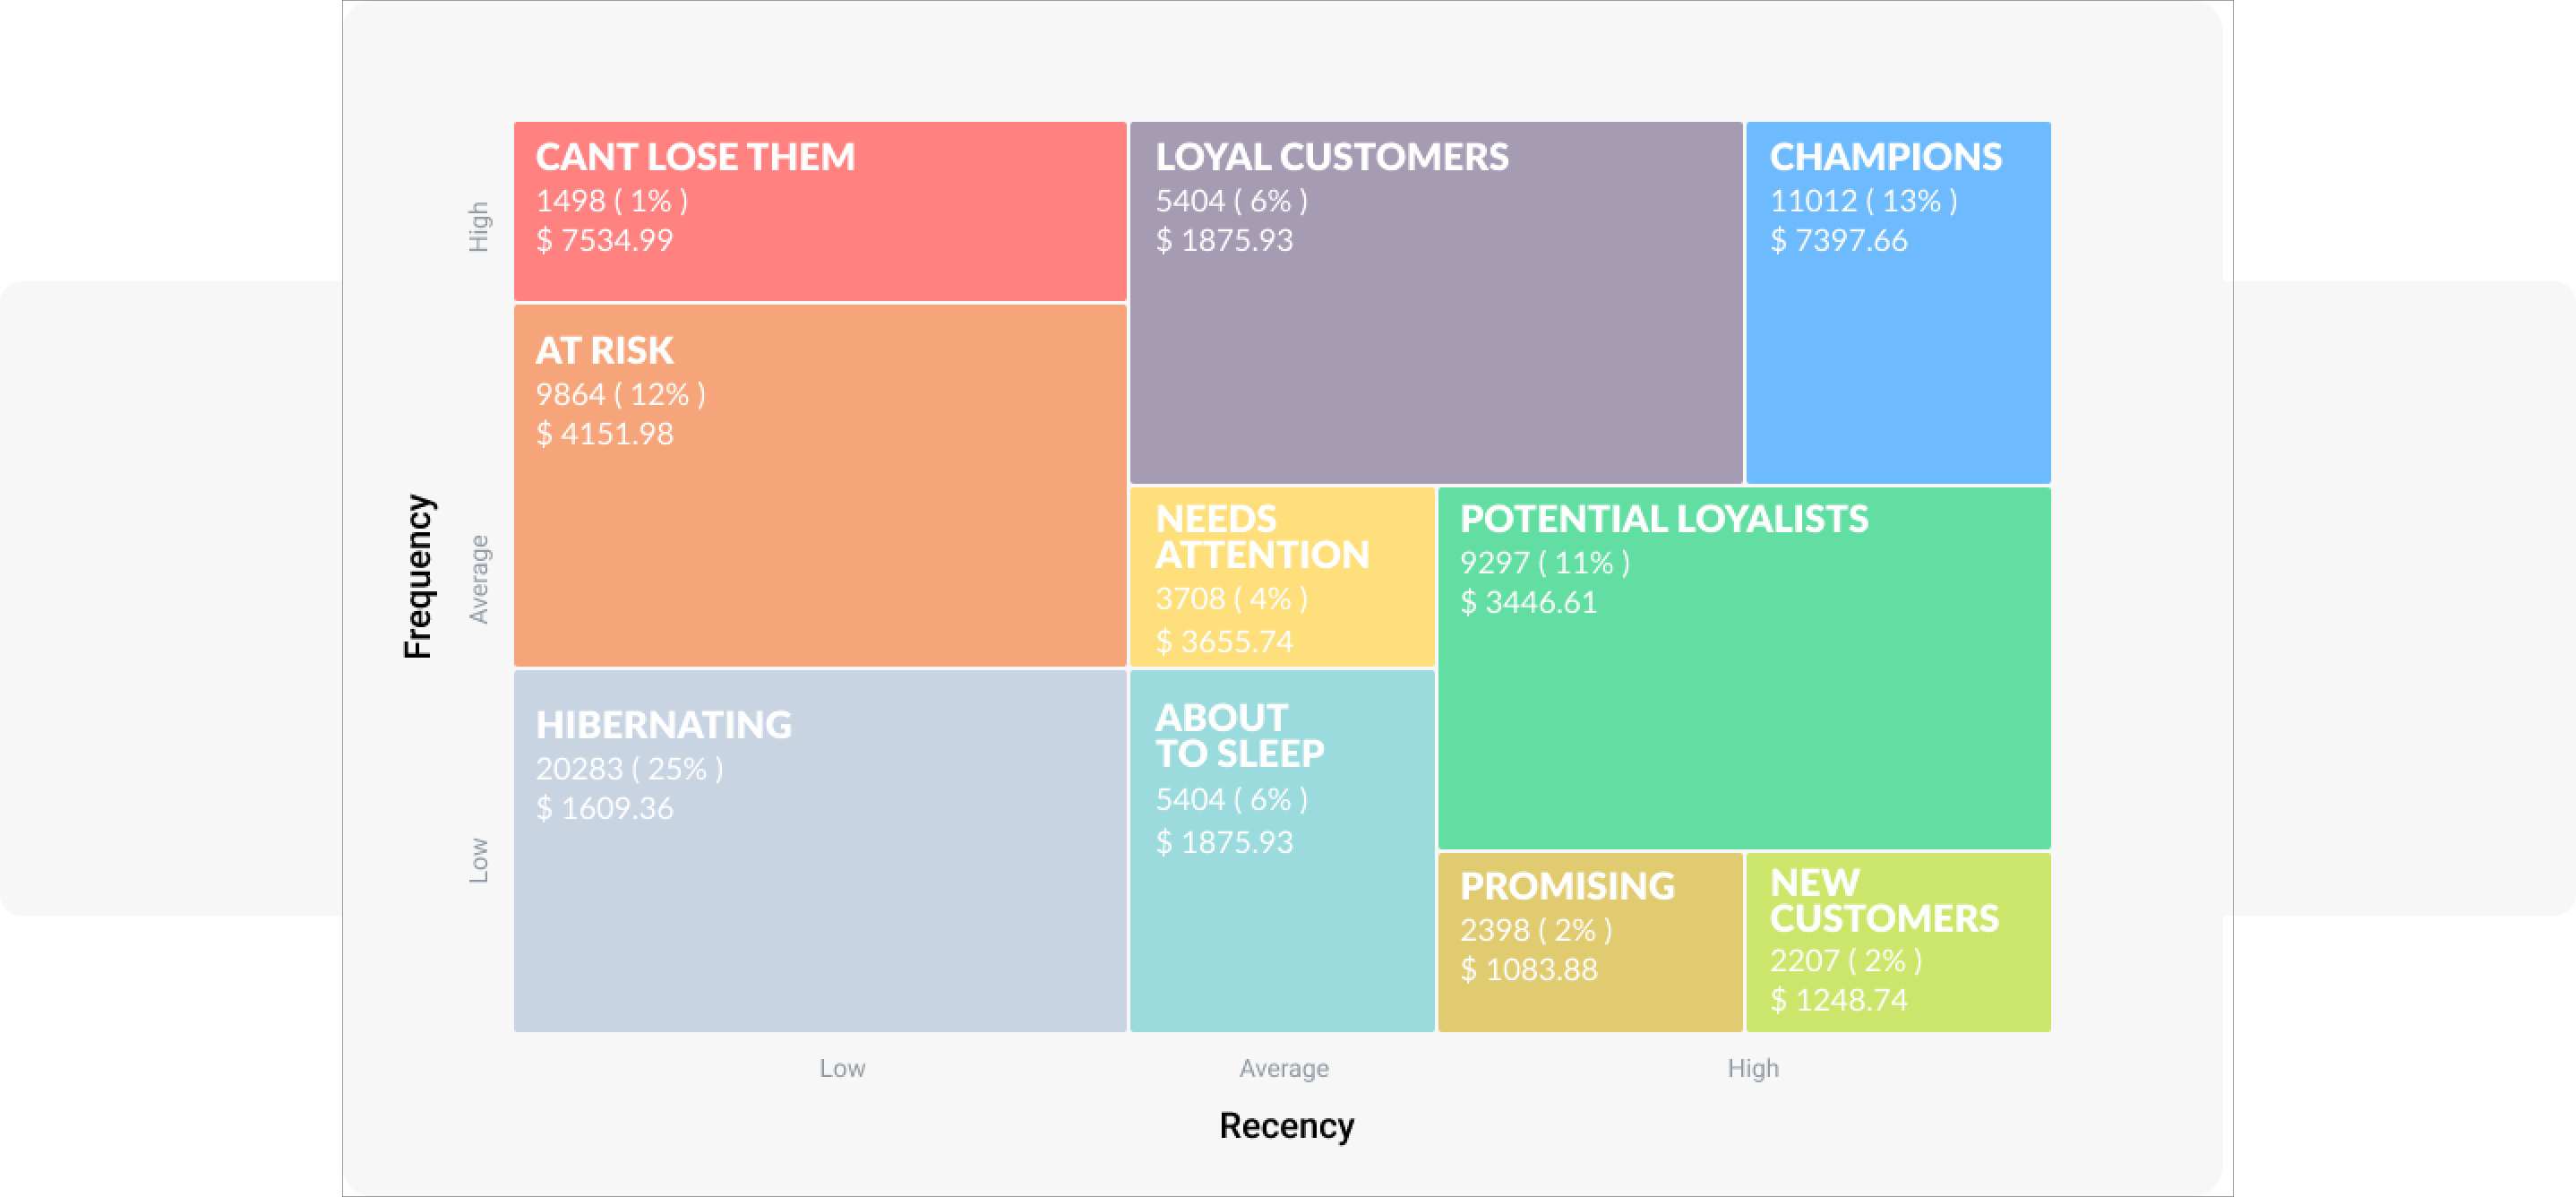
For your conversion efforts, focus on three RF segments:
- Champions: these users are the most active and engaged, having interacted frequently and recently. Champions are your strongest candidates for upgrading.
- Loyal customers: these users engage with your app consistently, though not as frequently as Champions. By showcasing exclusive benefits, you can encourage these users to leap to a paid plan;
- Potential loyalists: These users have shown recent interest and engagement and are close to becoming regular users. They’re already familiar with the app, making them receptive to premium feature suggestions.
Freemium app conversion rate: What to expect
Understanding the industry average for freemium app conversions can help you set realistic goals. Conversion rates for freemium apps typically range from 2–5%, while certain categories like productivity or health apps may achieve higher rates.
By tracking your app’s conversion rate and continuously refining your strategy, you can benchmark your results and optimize to reach or surpass the average.
How to improve freemium app conversion rates
Here are some actionable tactics for boosting your app’s conversion rate:
✅ Optimize upgrade touchpoints
Focus on instances of frustration, like when users experience limitations in their current plan, like reaching the maximum number of saved items or running out of daily usage limits.
✅ Offer tiered subscription options
Allow users to choose from multiple subscription levels, increasing accessibility and appeal.
✅ Run A/B/n tests on messaging and paywalls
Test the variations of copy, design, and timing to see which messaging prompts and paywalls lead to the highest conversions.
✅ Capitalize on the seasonality
Freemium apps can benefit significantly from seasonal trends, just like e-commerce platforms. Take advantage of the festive spirit by enticing your audience with exclusive seasonal offers.
✅ Personalize discounts
Offer personalized discounts to users based on their activity or loyalty to increase their chances of upgrading. Tailored discounts can create a sense of exclusivity and urgency, making users feel valued and more inclined to convert.
✅ Use social proof
Show testimonials, ratings, or a number of current subscribers to enhance trust and make the paid plan more attractive.
More real-life examples of upgrade messaging
In-app messages
The VOS mental health app offers users the option to purchase a paid subscription when they try to close an ad:

Push notifications + In-apps
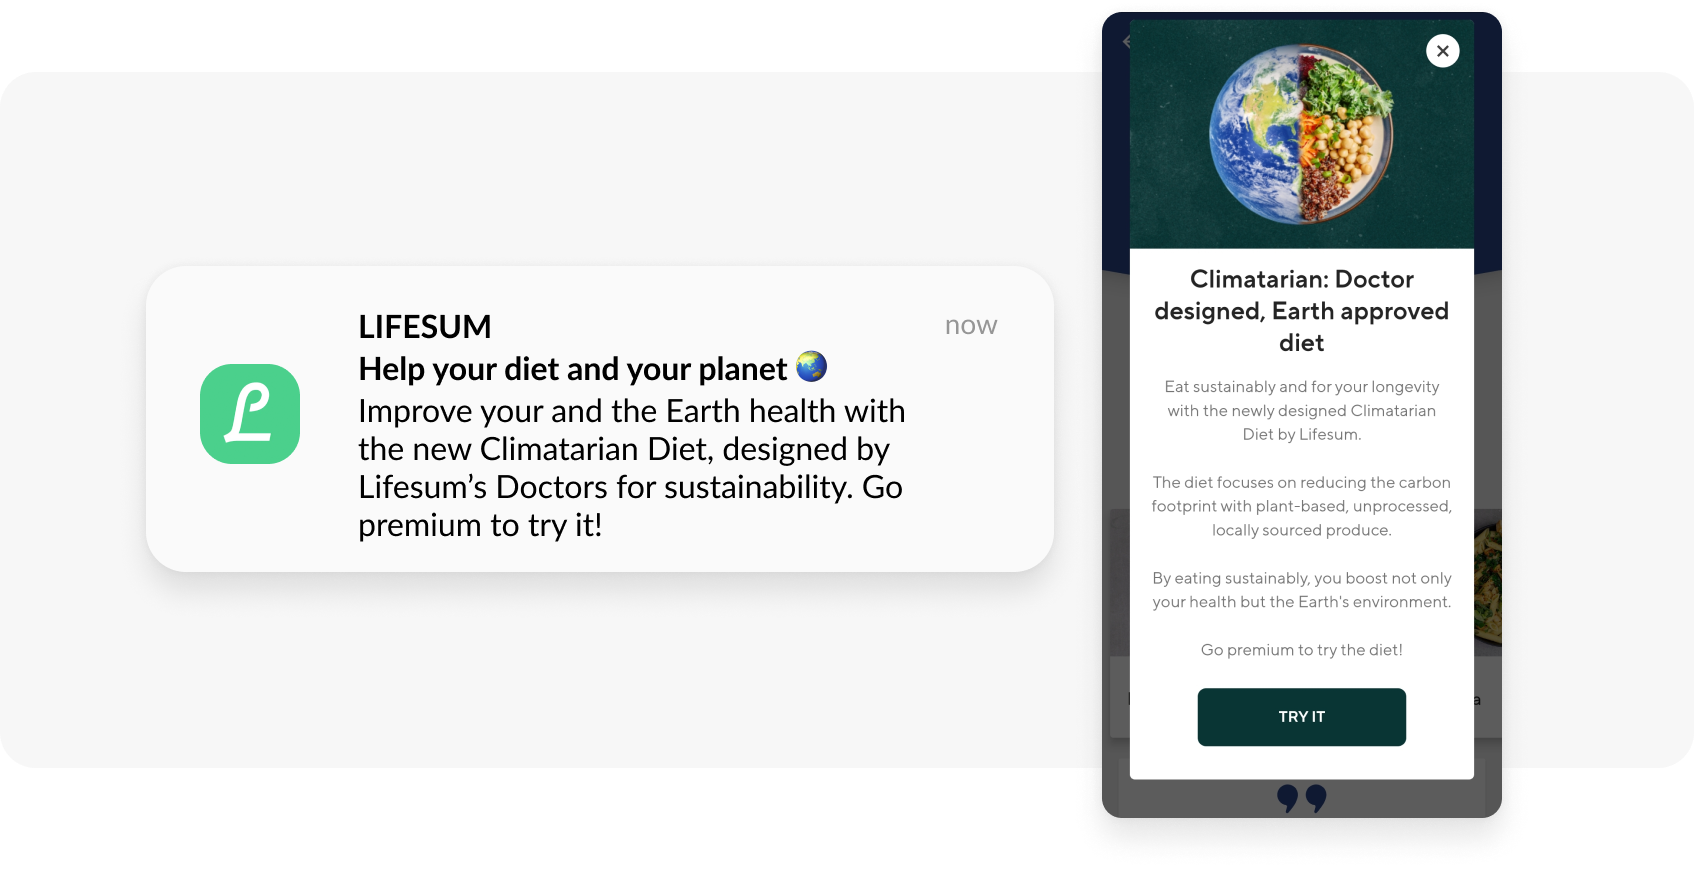
The Lifesum app engages users through two channels. First, it sends a push notification recommending a meal plan from the premium subscription. If the user taps on the push, the app follows up with an in-app message with a detailed description of the plan’s value:
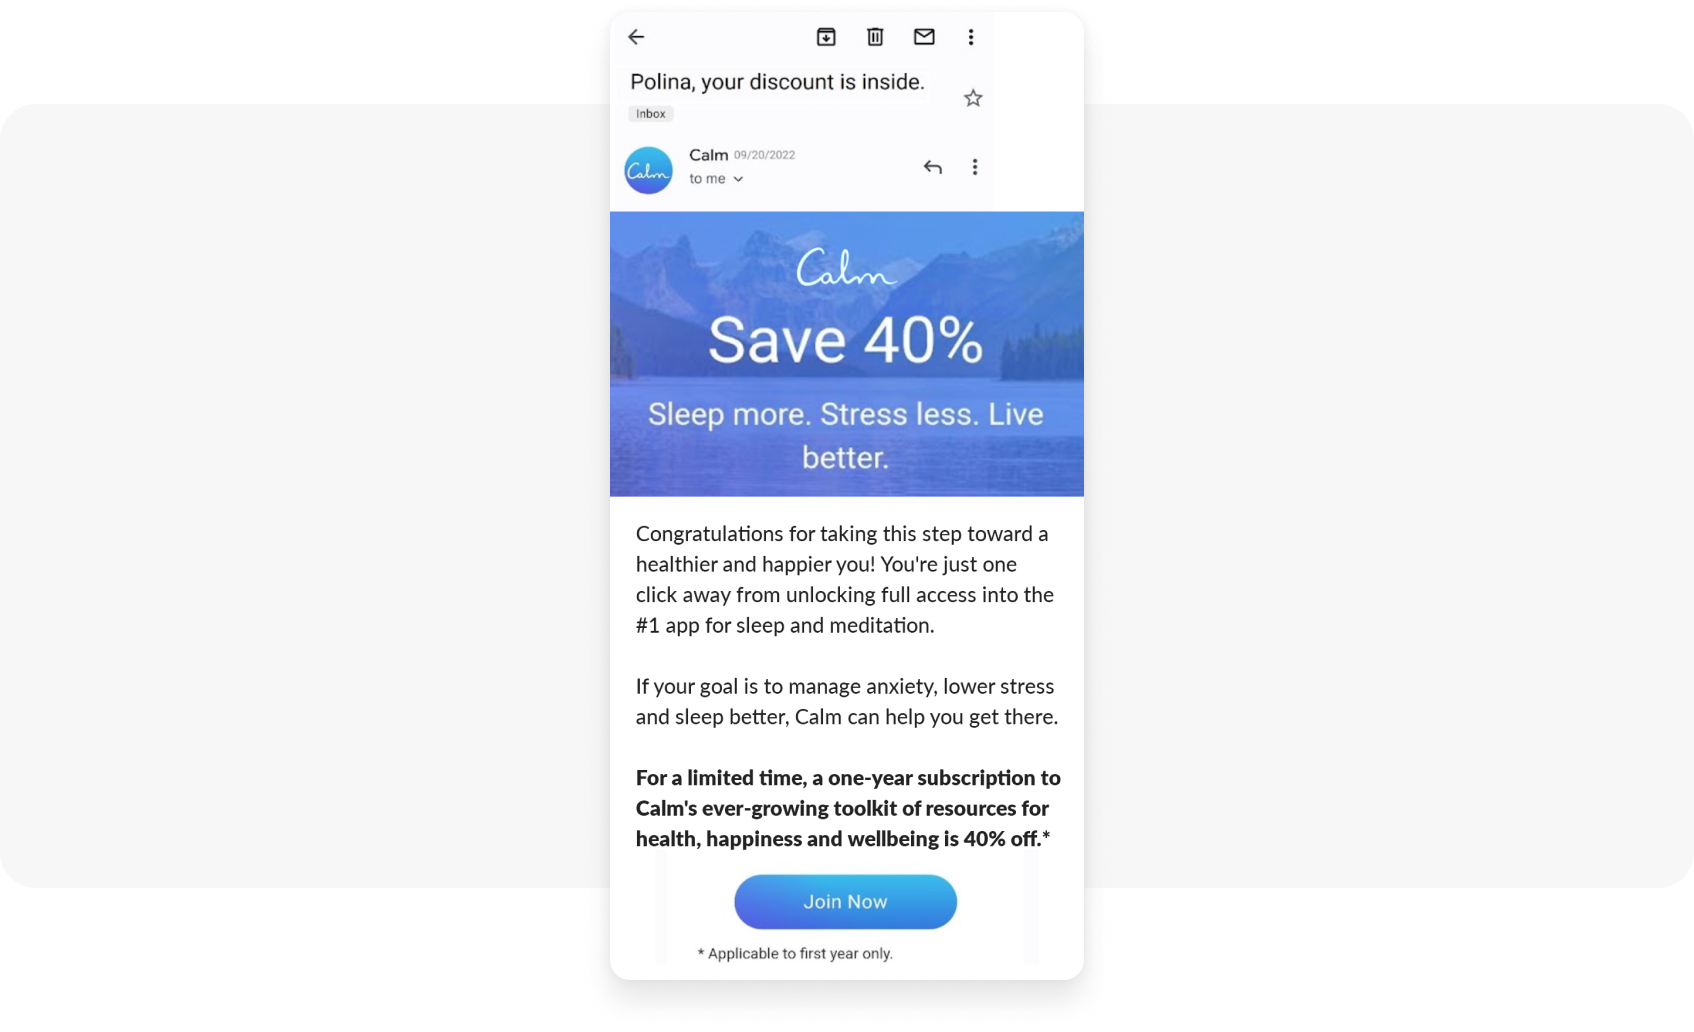
The Calm meditation app sends an email to new users, offering a limited-time discount on their premium subscription:
________________________________________________________
Ready to take the next step? Explore how Pushwoosh can support your conversion efforts with advanced automation, segmentation, and content creation tools. Book a demo today and unlock the potential of your product!