
Among other improvements and changes that come along in iOS 8, Apple introduced interactive notifications that let you take actions on push notifications right from the notification banner or alert without losing focus from the app you’re in at the moment.
Pushwoosh has recently added so-called iOS Categories that allow you to create custom push buttons right from your Pushwoosh Control Panel.
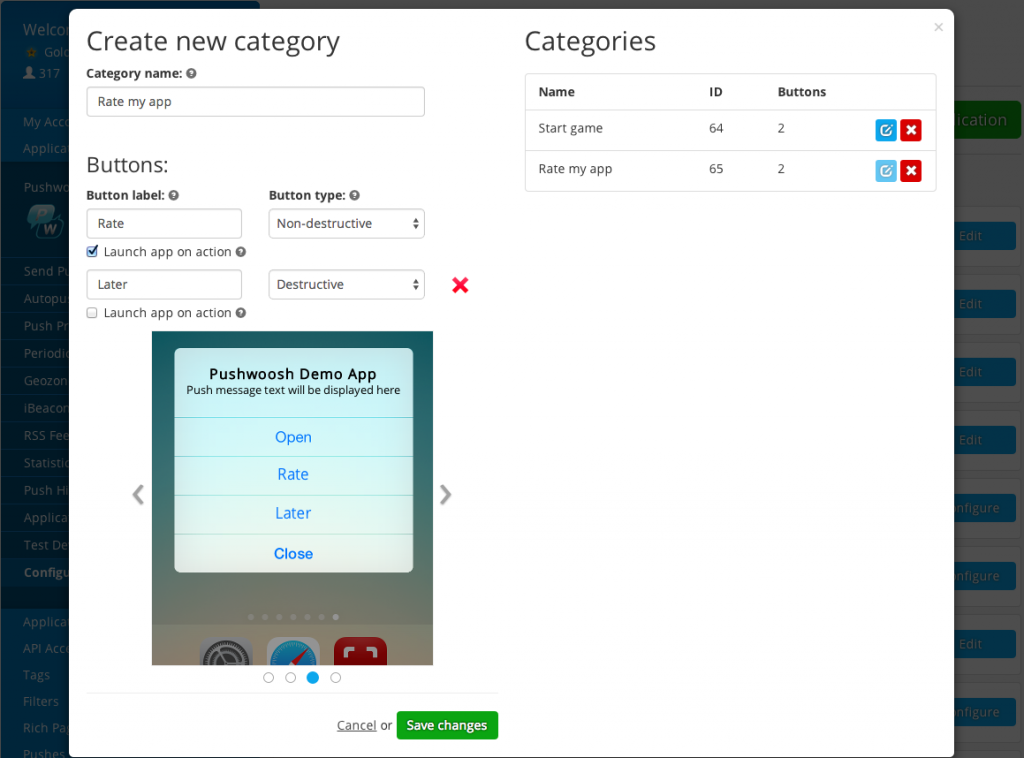
Creating Categories in Pushwoosh Control Panel
- First of all, you should create a Category in your Pushwoosh Control Panel. A category contains either one or two buttons.
- Open a Configure page of your application in Pushwoosh, and click the Edit Actions button.
- Give a name to the Category you are about to create, you will use it for your further reference.
- Specify the text which will be used as a button label. iOS displays up to 2 lines of text.
- Select a button type:
- Destructive – the button is red, signifies actions such as delete, reject, dismiss, etc.
- Non-destructive – the button is blue, signifies positive actions.
- Choose whether you would like your app to be launched in the foreground when a user taps on the button by enabling the “Launch app on action” checkbox.
- Click “Save”, and it will be saved in Pushwoosh with a Category ID.

API
When your application calls /registerDevice, Pushwoosh API returns the response that contains a list of available Categories with their IDs and details for each button as follows:
In order to send your push with a category from the Control Panel, you can simply select it in the iOS platform settings while composing your message. In case you are sending your pushes remotely through Pushwoosh API, in the /createMessage requests you should use the "ios_category" parameter with a corresponding Category ID as a value:
Buttons & Actions in Pushwoosh iOS 8 SDK
In order to perform various actions upon opening an app call the following method of the UIApplicationDelegate protocol: