A one-size-fits-all onboarding process often falls short. If you want to engage your users and keep them coming back, personalized onboarding is the way to go.
In this article, we outline best practices for using context to improve mobile app user retention.
Classic onboarding and personalized onboarding: What’s the difference?
Classic onboarding collects user data and permissions upfront through a series of steps before users engage with the app. It involves a welcome tour that does not consider the user’s intent, knowledge level, or the specific features they are interested in.
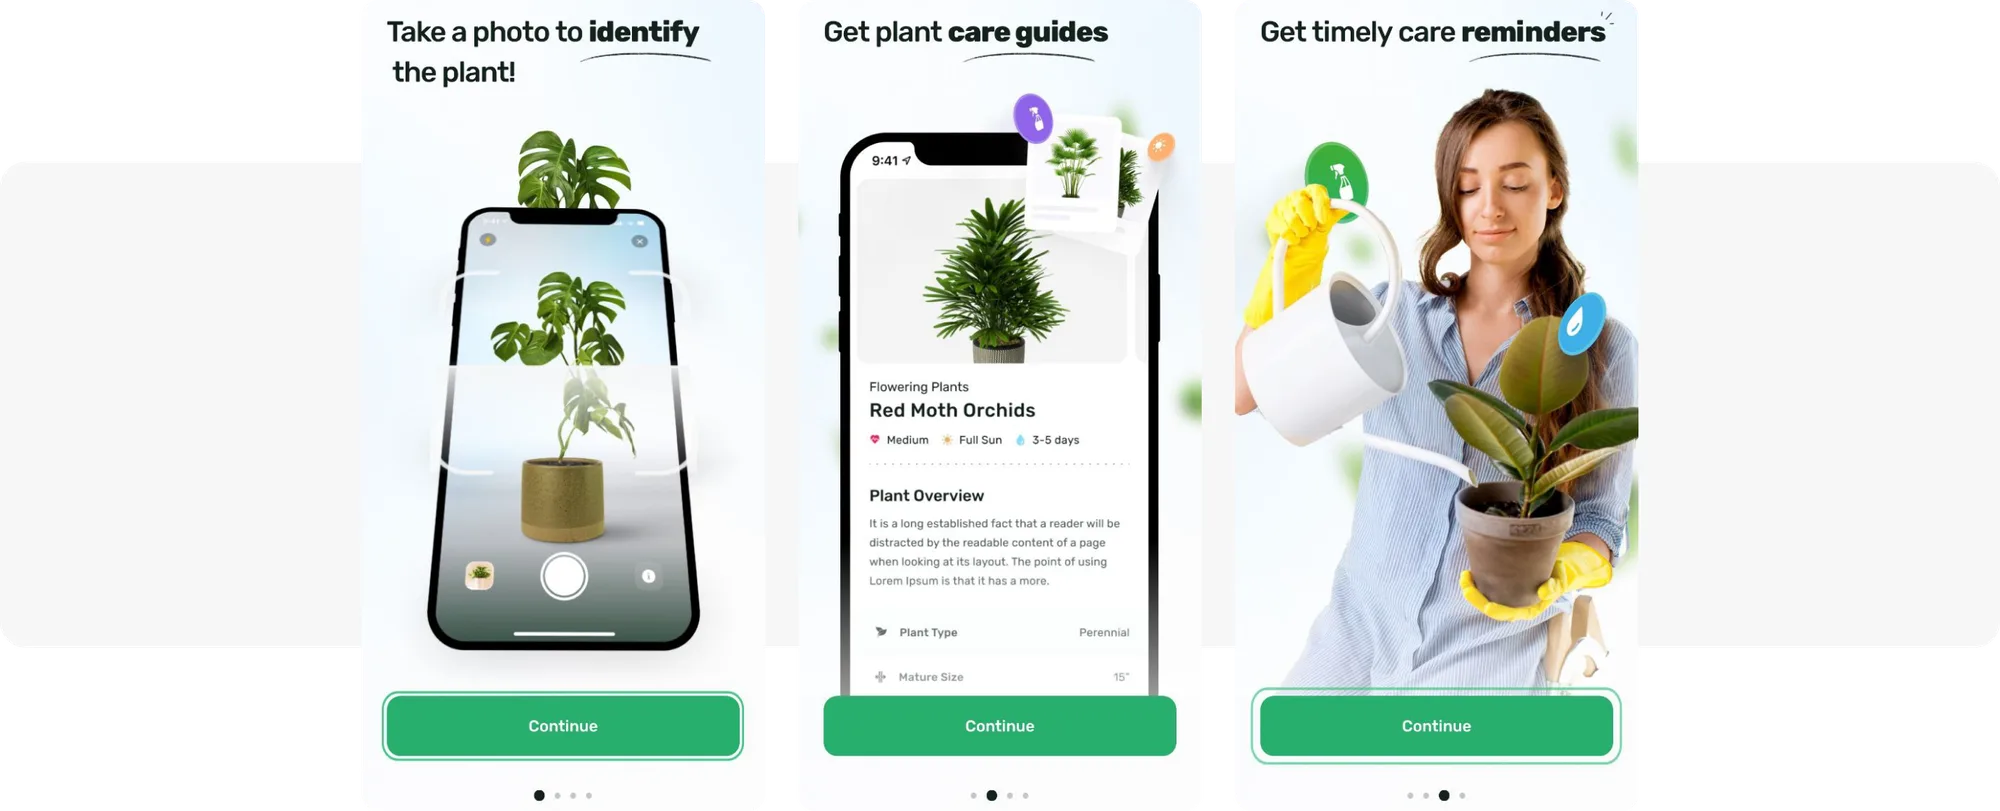
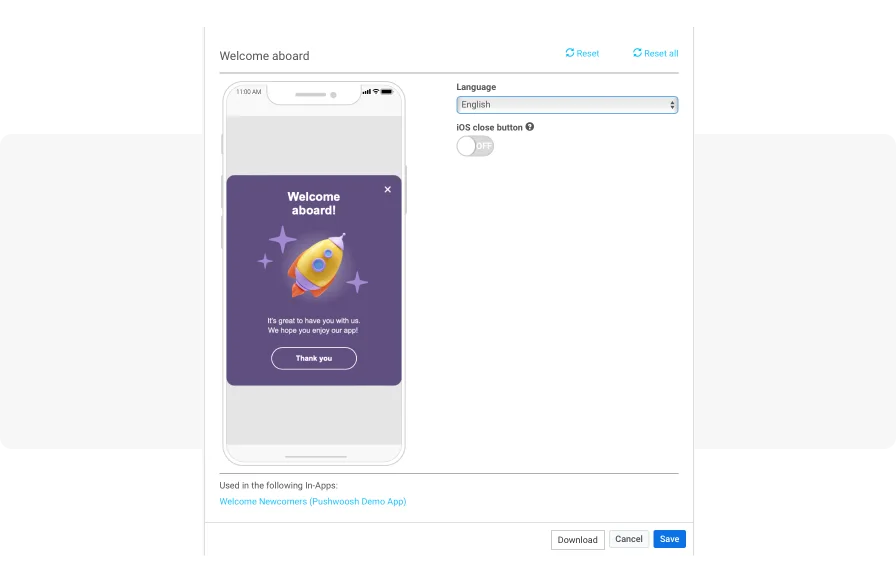
PlantApp prefers classic onboarding
Contextual or personalized onboarding, on the other hand, helps users explore features as they interact with the app. It shows specific content and full-screen in-app tutorials based on user actions or inaction, tailoring the experience to individual needs.
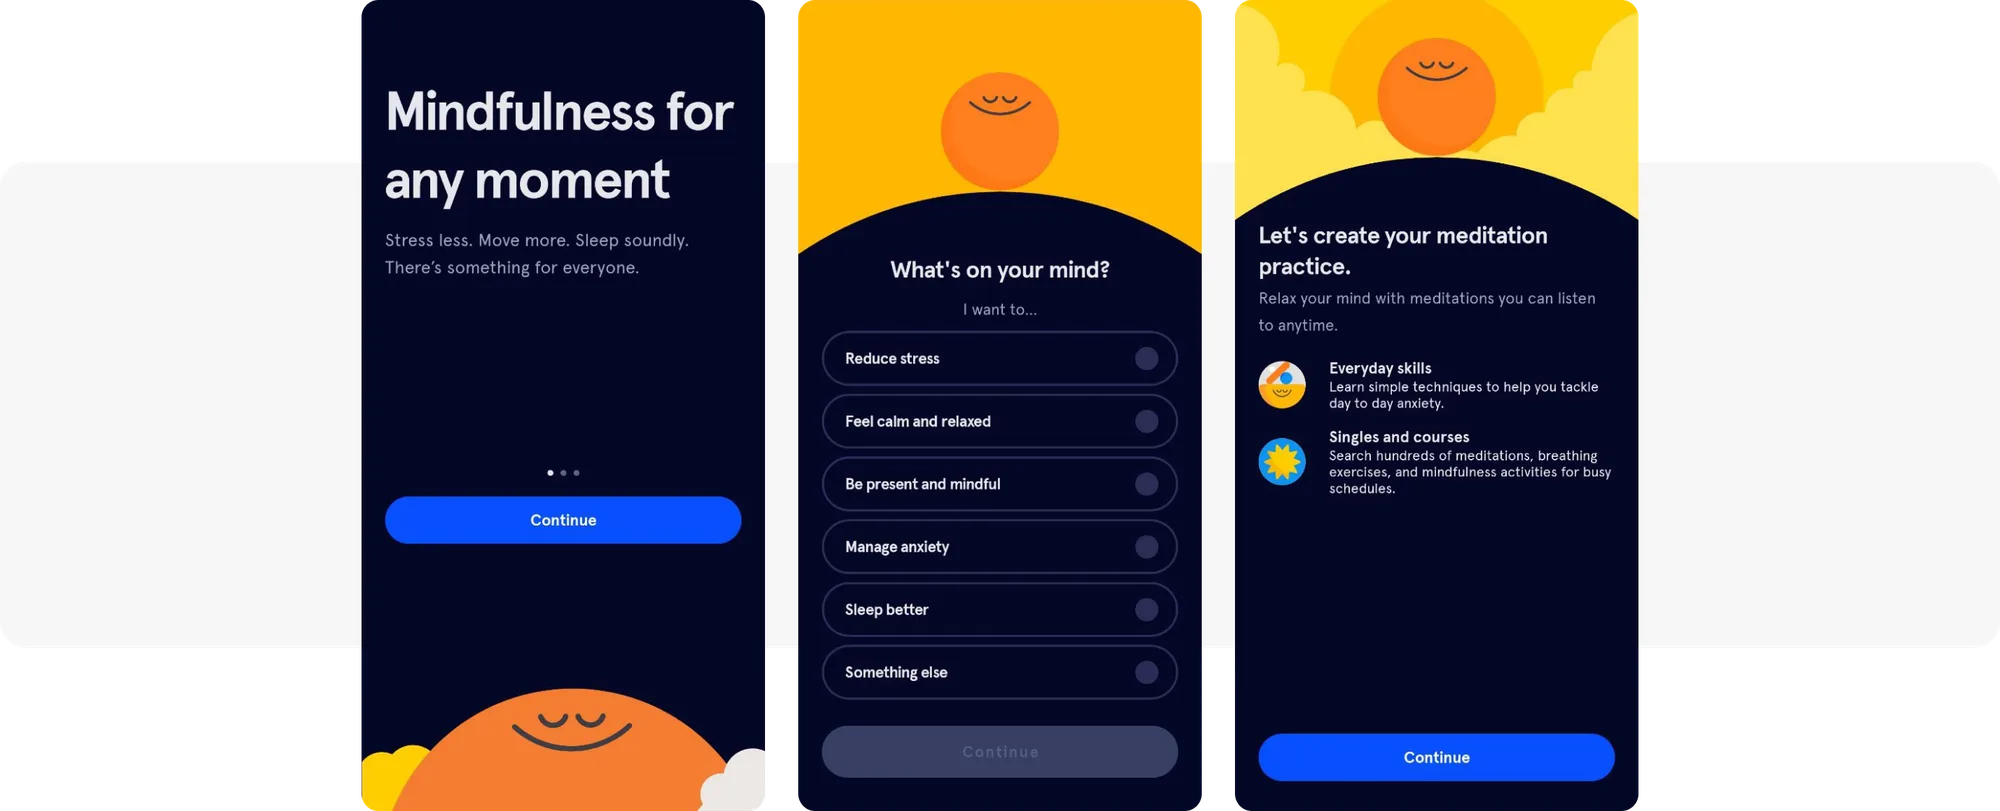
HeadSpace sticks to personalized onboarding
Choose classic onboarding if the goal is to gather user data early. If the aim is to create deeper engagement with your app’s features, opt for contextual onboarding.
What onboarding metrics should you track?
You should focus on tracking the specific metrics that align with your onboarding goals. There’s no need for tracking all existent onboarding KPIs.
In general, these are the onboarding metrics app marketers keep an eye on:
- Onboarding Completion Rate: The percentage of users who complete the entire onboarding process. This metric helps assess how effectively users are guided through the initial setup.
- Registration Rate: The percentage of users who complete the registration form or sign-up process during onboarding. It indicates user commitment.
- Retention Rate: The percentage of users who continue to use the app over a period of time. High retention rates indicate that users find value in the app.
- Day 1 (D1) Retention Rate: To assess the effectiveness of your onboarding efforts, you want to track specifically the percentage of users who return to the app the day after the install. The Day 1 retention rate also indicates the initial app appeal and a match with real users’ needs.
- Activation Rate: The percentage of users who perform a key action that signifies the start of their engagement with the app. It’s an indicator of whether users are finding the app useful.
- Uninstall Rate: The percentage of users who uninstall the app within a given timeframe. A high uninstall rate indicates issues with app performance.
- First Session Uninstall Rate: The percentage of users who uninstall the app immediately after their first use. This metric helps identify critical flaws right after onboarding.
- Customer Lifetime Value (CLV): The total revenue expected from a user throughout their engagement with the app. CLV helps in understanding the long-term value of acquiring and retaining mobile app users.
- Push Notification Opt-in Rate: The percentage of users who agree to receive push notifications. This metric is vital for future user engagement.
- Subscription Rate: For subscription-based apps, this metric tracks the percentage of users who convert to paying subscribers.
- App Tracking Transparency (ATT) Consent Rate: The percentage of users who agree to share their data for tracking.
Some marketers may want to track the onboarding skip rate. However, the best practice is to focus on the onboarding completion rate and investigate the drop-offs.

Co-Founder at REPLUG
Generally, tracking the onboarding completion rate rather than the onboarding skip rate is crucial. If users do skip parts of the onboarding process, we need to identify at which point they drop off so we can make improvements.
Personalized onboarding: how to set it up for success
1. Collect user data from the start
Onboarding sets the stage for further personalization of the in-app experience and out-of-app communication. So don’t hesitate—start it as soon as you can:

Co-Founder at Aperture
Ideally, you should start personalizing your product as early as possible to maximize its effectiveness. However, the degree of personalization can vary depending on the user lifecycle stage and the data available.
During onboarding, you can get so much helpful information (e.g., name, geo, demographics, preferences), and you can use it to personalize messaging to increase engagement. Call users by their name and speak their language, and if you can, highlight elements which are popular in their geo in the initial flow.
Use the info you obtained at the onboarding stage to deliver targeted content based on user preferences to build a relationship with your newcomers and make them feel like a valued part of the community.
By collecting first and zero-party data during onboarding, such as tracking user actions or conducting surveys, you lay the groundwork for tailoring user experiences. Blinkist’s onboarding is a great example of it:
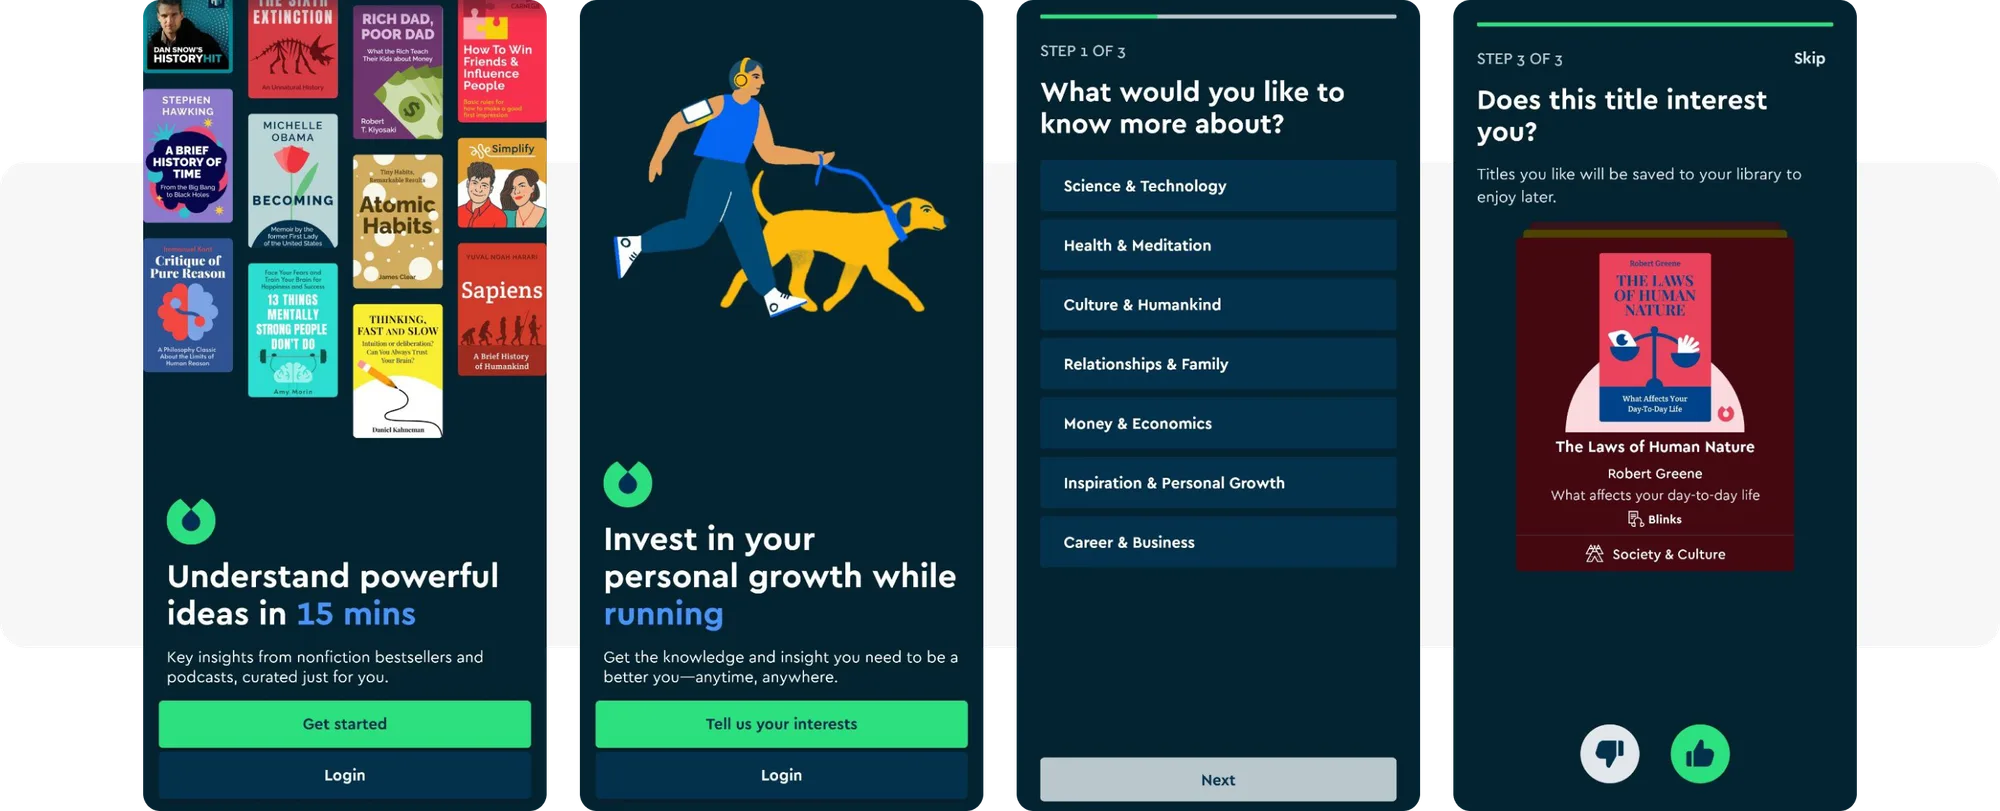
Blinkist’s personalized onboarding
This information helps the app understand their audience’s intentions and anticipate their expectations—and will be a great asset when segmenting users.
2. Create an onboarding flow across all channels
When it comes to mobile onboarding, in-app messages are the most natural choice. This channel reaches users at their most engaged moments within the app, providing immediate guidance, tips, and value propositions right when users need them.
Don’t underestimate other channels, though. They can strengthen your onboarding campaign. Let’s have a closer look at their fortes:
- Push notifications: Push notifications are immediate and great for encouraging users to complete onboarding steps or re-engage them with the app later. Most often, you will want to combine in-app messages with push notifications.
- Email: Emails can offer detailed information and personalized content to new users. Welcome email messages tend to have high open rates and can re-engage users who haven’t interacted with the app recently.
- SMS: SMS can be used to deliver critical information and reminders, proving the indisputable value of staying in touch with you.
To manage your messaging flows effectively, utilize an omnichannel campaign automation tool like Pushwoosh Customer Journey Builder:
- Keep your campaigns organized by managing cross-channel messaging within one interface.
- Use the visual builder to create sequences of messages triggered by user actions or based on individual user properties and conditions.
- Decide what event will start the journey: by default, it can be the first App Open, or you can create a custom event that you will use further on for triggering behavior-based messages and building user segments.
- Add the Trigger-based Entry step to the journey canvas and pick the required event and refine its conditions by adding specific event attributes. If you need, you can add numerous Trigger-based Entries. Any of them will set the journey in motion.
- Put a series of welcome in-app messages right after the trigger event.
- Track the results of your onboarding campaign right on the canvas of Pushwoosh Customer Journey Builder.

 🌟AvaTrade
leveraged Pushwoosh for omnichannel onboarding to engage and convert users.
Through a series of push notifications and in-app messages, AvaTrade encouraged
‘Anonymous’ users to register. This approach resulted in an impressive 12%
conversion rate to real account sign-up.
🌟AvaTrade
leveraged Pushwoosh for omnichannel onboarding to engage and convert users.
Through a series of push notifications and in-app messages, AvaTrade encouraged
‘Anonymous’ users to register. This approach resulted in an impressive 12%
conversion rate to real account sign-up.

Ori Matarasso
CMO at AvaTrade
When we’ve personalized our content to specific segments of our audience, we’ve seen a significant increase in CTR compared to non-personalized content. This suggests that our audience is more likely to engage with content tailored to their interests and needs.
Knowing this, our next recommendation is:
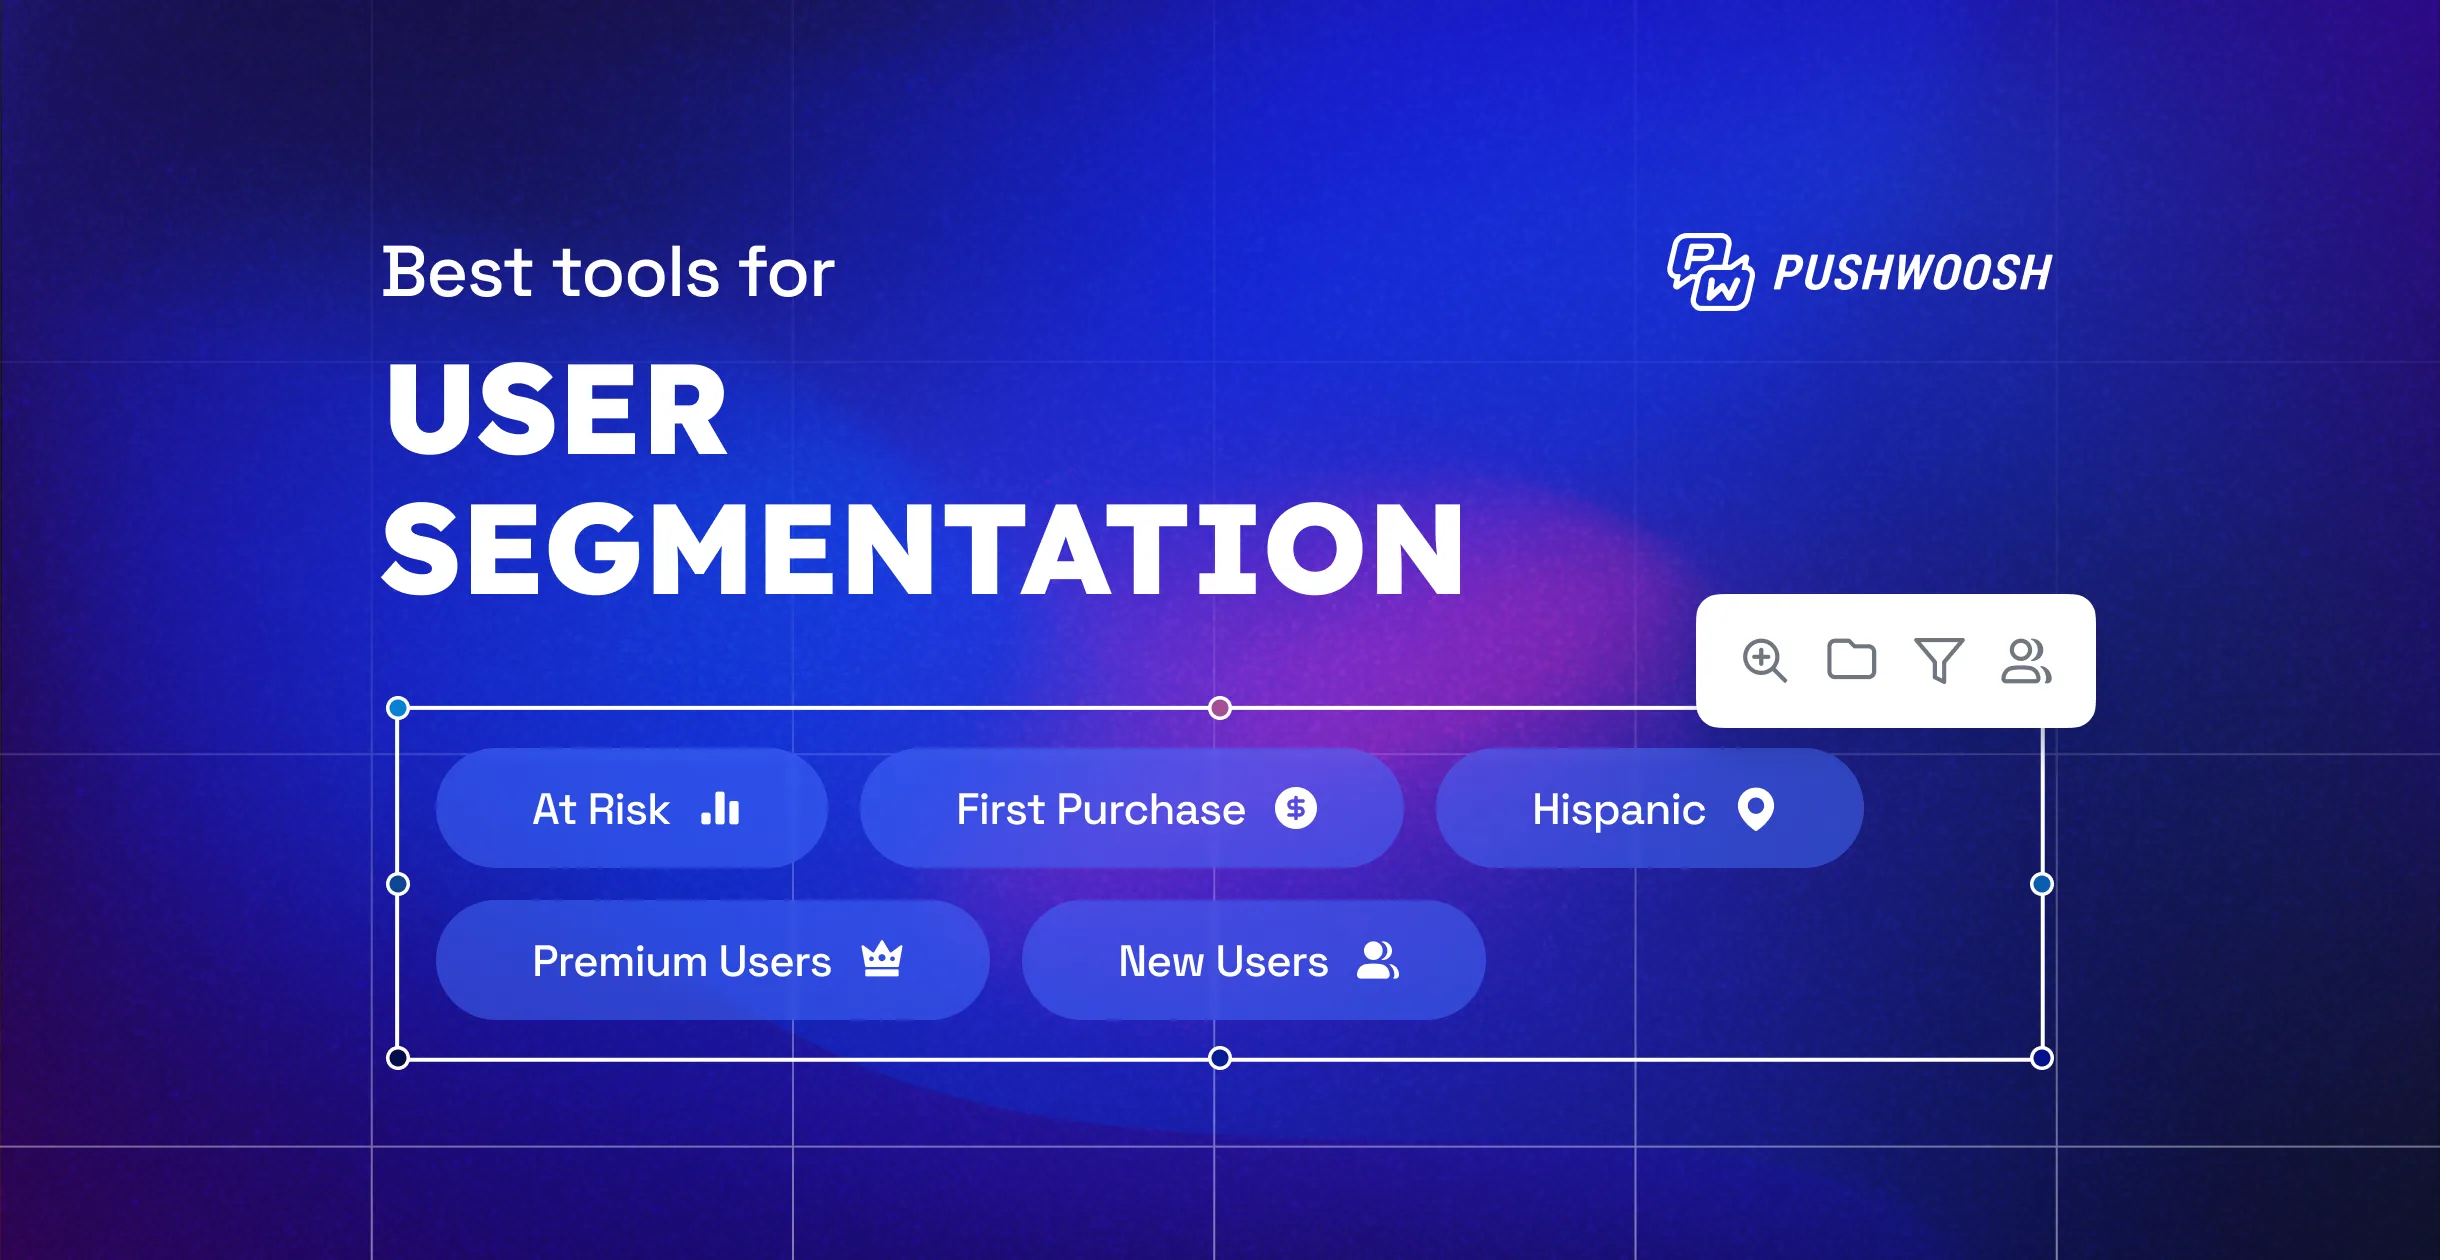
3. Drive personalization through segmentation
Segmentation can greatly enhance onboarding by allowing you to tailor your communication to different user groups. For instance, you can segment user groups based on their:
- acquisition channels;
- familiarity with your app (days since the app install; features tried; free trial or premium subscription unlocked);
- demographics, and location, and manually set preferences;
- real-time and past behavior
Pay attention to the events users have (or haven’t) triggered and the messages they have clicked on, and then customize onboarding messages accordingly.
Pushwoosh supports five layers of segmentation:
-
primary segmentation to segment by past/real-time events and tags;
-
visual segmentation via a visual builder;
-
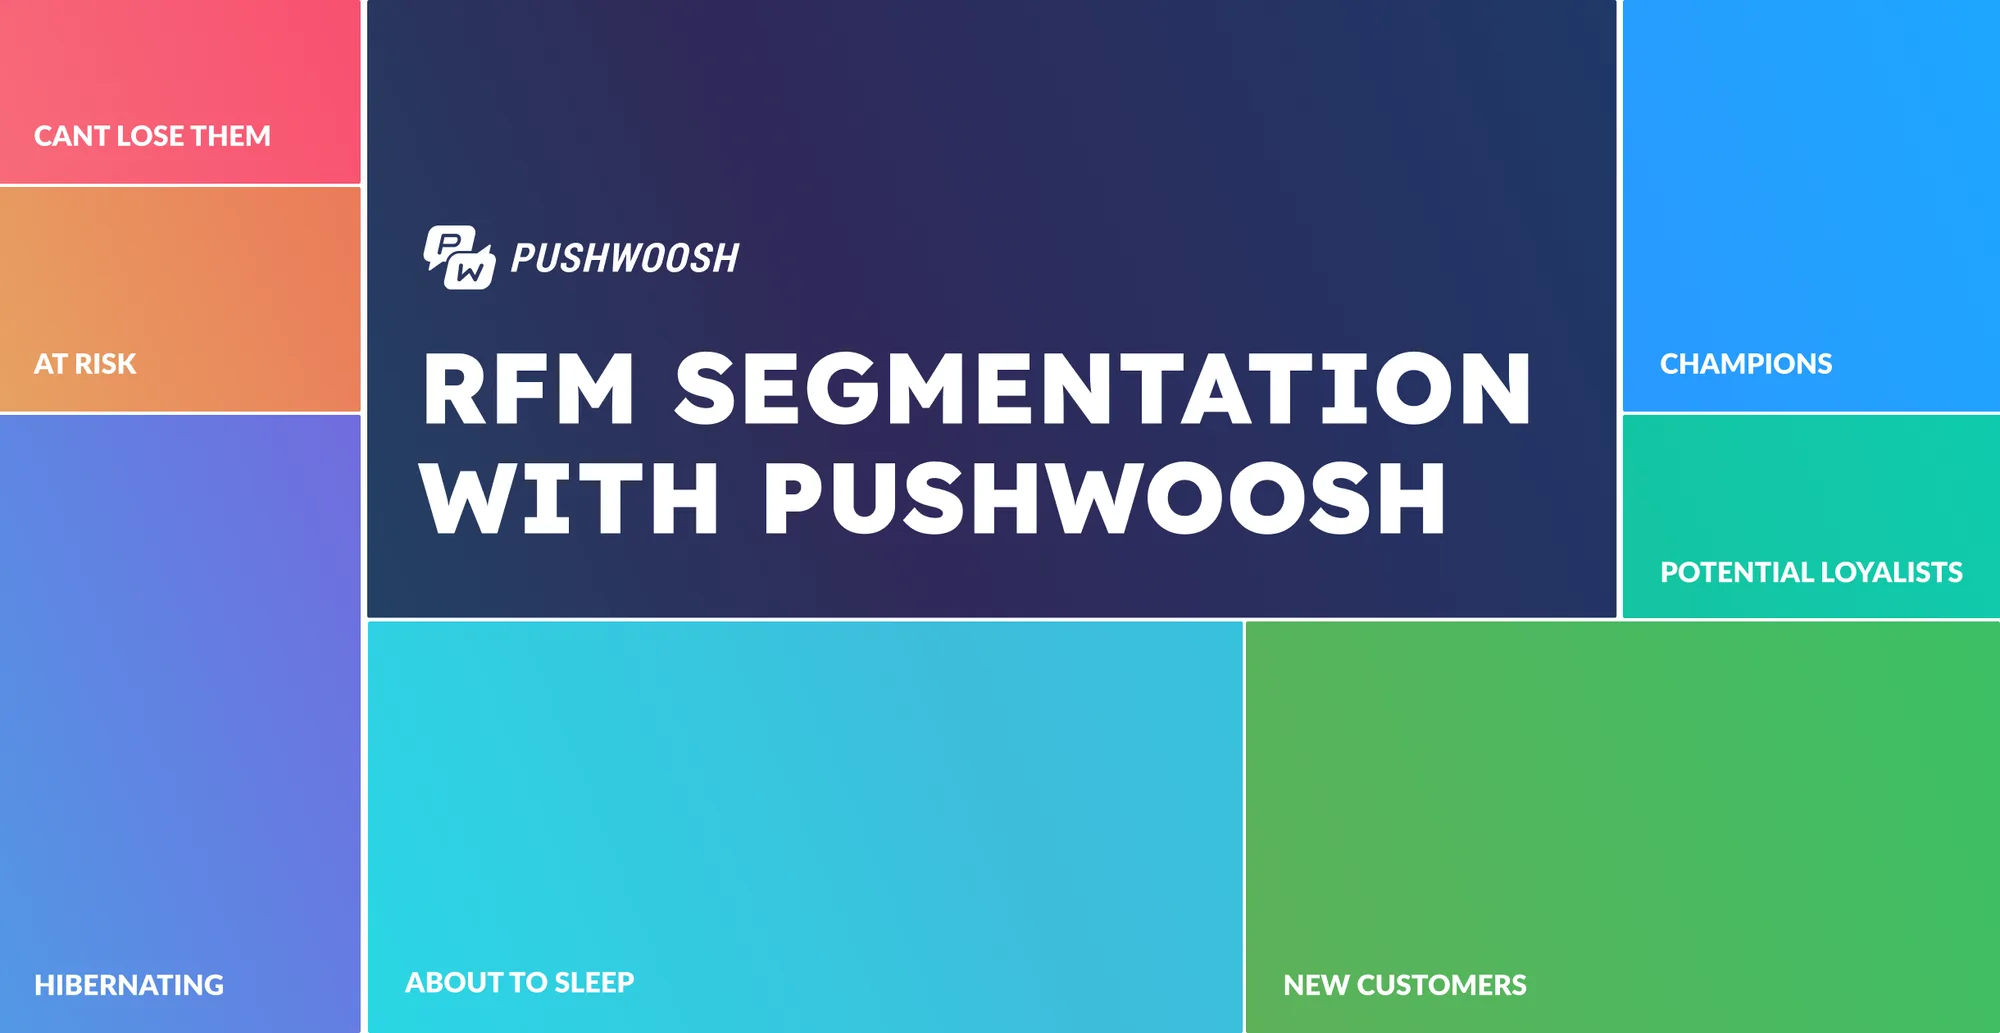
RF(M) segmentation to target high-value segments;
-
high-speed segmentation for rapid message delivery;
-
predictive segmentation to prevent churn.
All these tools can be used for effective personalization.
⚽ Example: Imagine a sports news app onboarding new users.
- Using primary segmentation, the app can track and segment users based on real-time events, like the completion of initial setup steps.
- Visual segmentation allows the app to create a dynamic journey, presenting different continuous onboarding flows based on user interactions.
- RF(M) segmentation can identify users who are more likely to subscribe to premium features based on their engagement during the trial period.
- High-speed segmentation ensures immediate delivery of personalized and urgent news depending on the sports users keep tabs on.
- Predictive segmentation helps identify users who might drop off, enabling the app to send targeted encouragements to keep them engaged.
The effort will pay off. Here is one of the success stories that prove it:
🌟Bantoa, a fashion app, uses a survey for their onboarding to learn
more about their users’ clothing preferences and shopping habits. They even take
into account users’ favorite colors to then come up with personalized
recommendations and
messages.
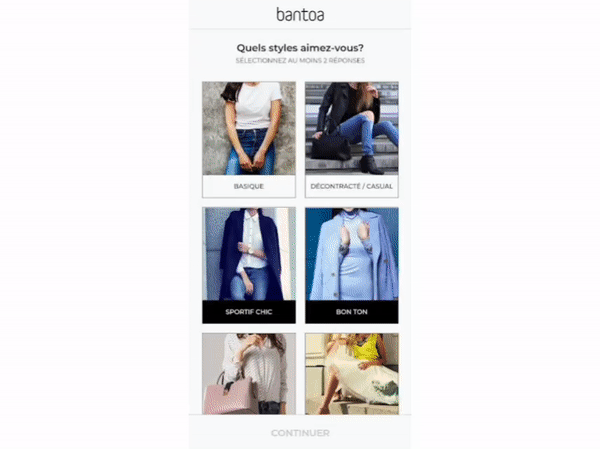
Bantoa’s onboarding survey
🌟Equipped with all this data, Bantoa can segment its audience at a granular level and send hyper-personalized push notifications via Pushwoosh.
By targeting users with personalized content based on their preferences, shopping habits, and past interactions, the app has achieved higher user activation rates (+28%), increased D30 retention (+37%), and a 94% monthly user engagement rate.
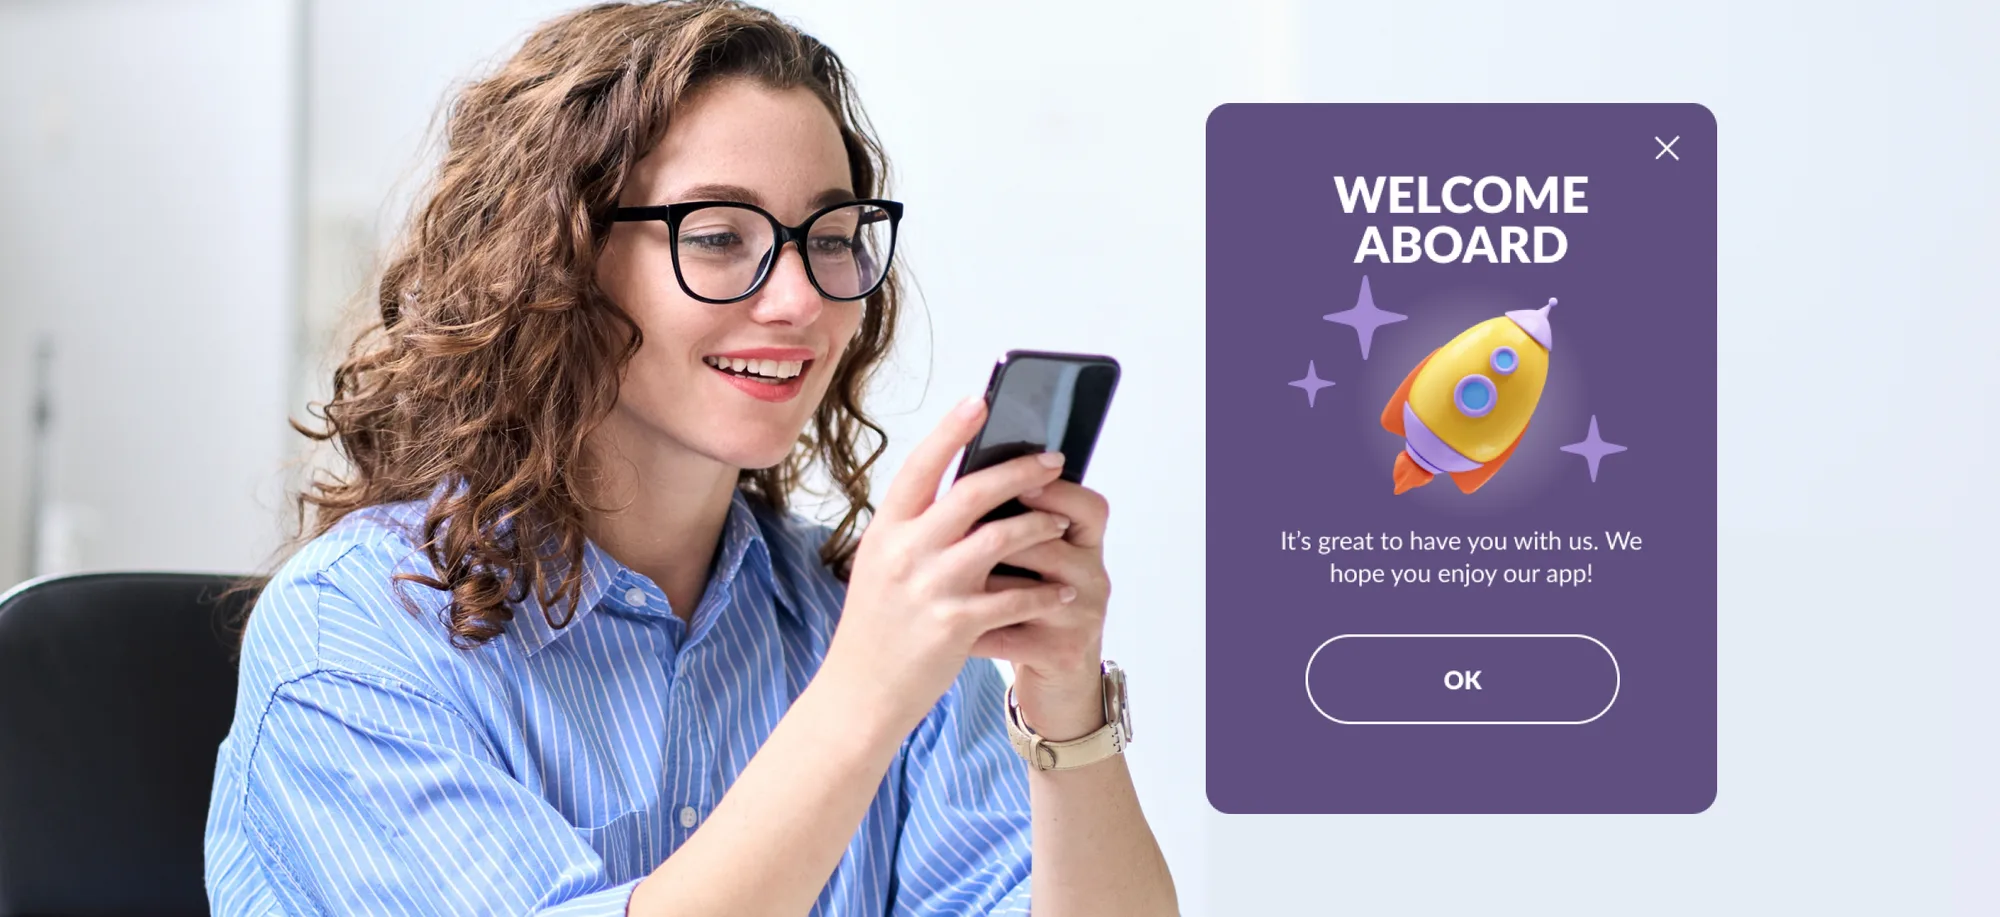
4. Build relationships during your in-app welcome series
You must greet new users, but you shouldn’t overwhelm them—what a challenge! Experimentation is your ally here.
Try varying the length of your welcome series, the moments and methods of requesting any permission, and the level of personalization. For example:
🪜Think how many steps your onboarding will take. The golden standard is six in-app screens; however, surveys and polls may require more messages.
🎨 Consider the format/design of your in-apps, as they influence users’ perception of the app.
- A half-interstitial or full-screen cover makes a strong first impression as a greeting.
- Inline in-app messages or sticky in-app messages are better for showcasing specific features because they don’t disrupt user experience.
You can design (and test) all of these formats in Pushwoosh’s drag-and-drop in-app editor without any coding skills.
Kickstart your welcome series creation with Pushwoosh’s ready-to-use in-app templates. Make the onboarding experience visually appealing at the snap of your fingers and save your creative talent for further experimentation.
Choose a template from the Pushwoosh library or create your custom in-app message
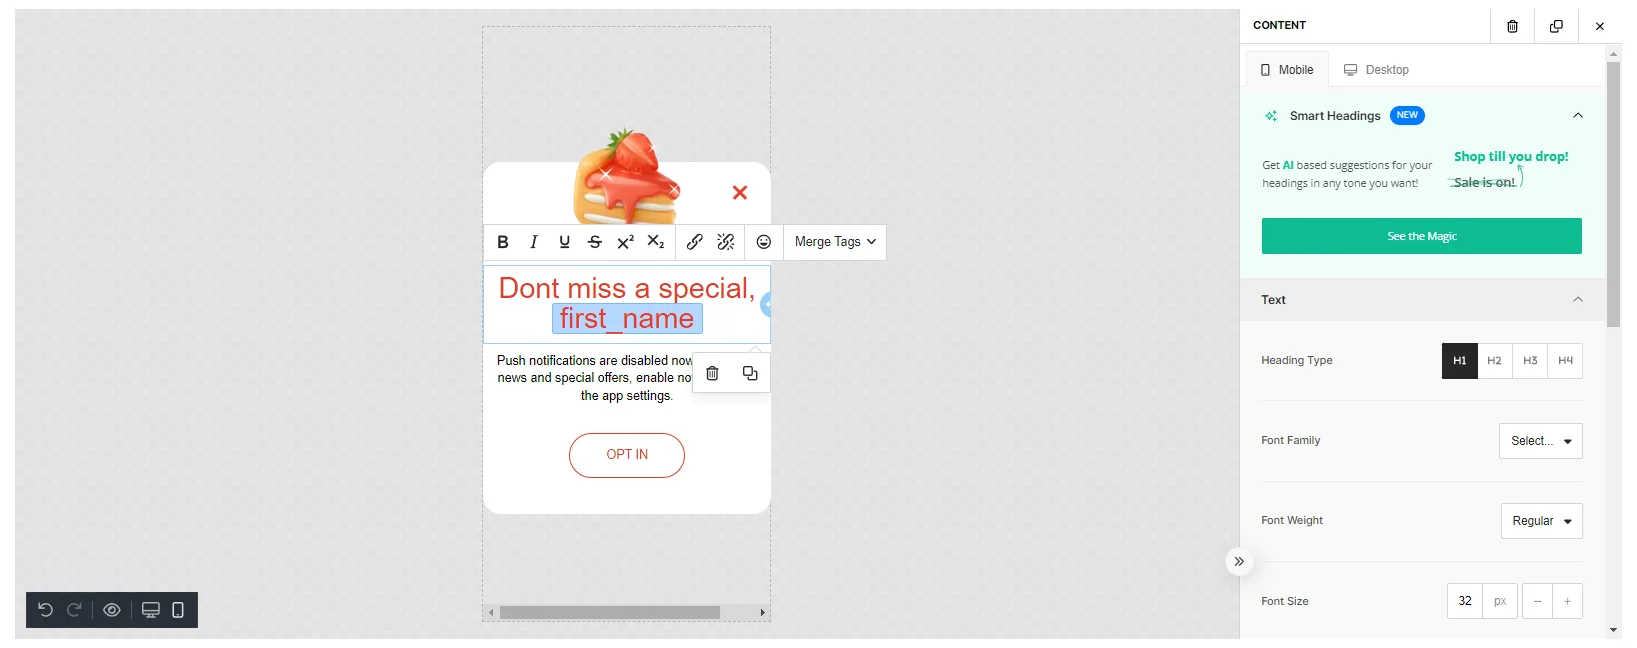
🧙Customize the main text, header, or button text using user-specific data such
as names or user preferences. To do so, you only need to set up Tags and merge
them into your Rich Media content.
For example, in case of a travel app, you can use the user’s first name and
his/her last viewed destination to personalize the content.
🌏 Speak users’ languages by localizing your in-app message in the Rich Media’s Editable language list.
🎞️ Consider providing users with a tour of the app’s key features. In-app videos
can be of great value in this case. You can add your own video when working with
Rich Media in Pushwoosh to give your users a personalized experience during
onboarding.
Think of an app that helps users learn to dance and show them the exact dancing
styles they’re most interested in!
👀 Time to ask questions! Сreate a poll to gather user preferences. Set up a tag of the list type in the Pushwoosh dashboard. Next, design a Rich Media page that contains the survey options. Then, when users submit the survey, update their tag values with the selected answers.
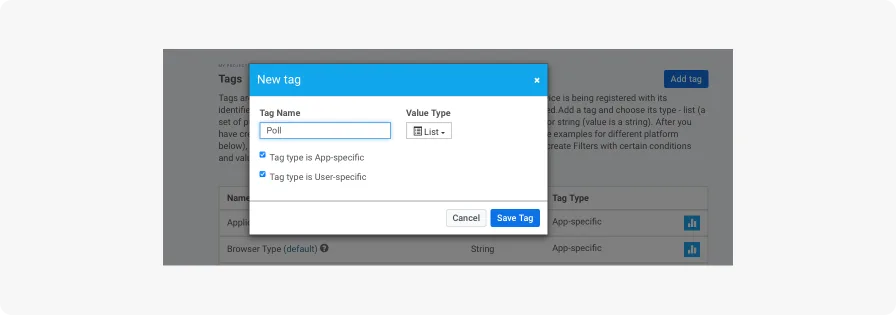
It takes a couple of clicks to create a new tag in Pushwoosh
Voila! We’re almost done—the only thing left is to create an opt-in message.
5. Encourage users to opt-in for push notifications
To increase the number of users who agree to get push notifications, consider taking the following steps:
- Show them a screen where they can choose different types of notifications.
- Explain clearly why they might like to receive notifications.
- Choose a good time to ask, like when they’re actively using the app.
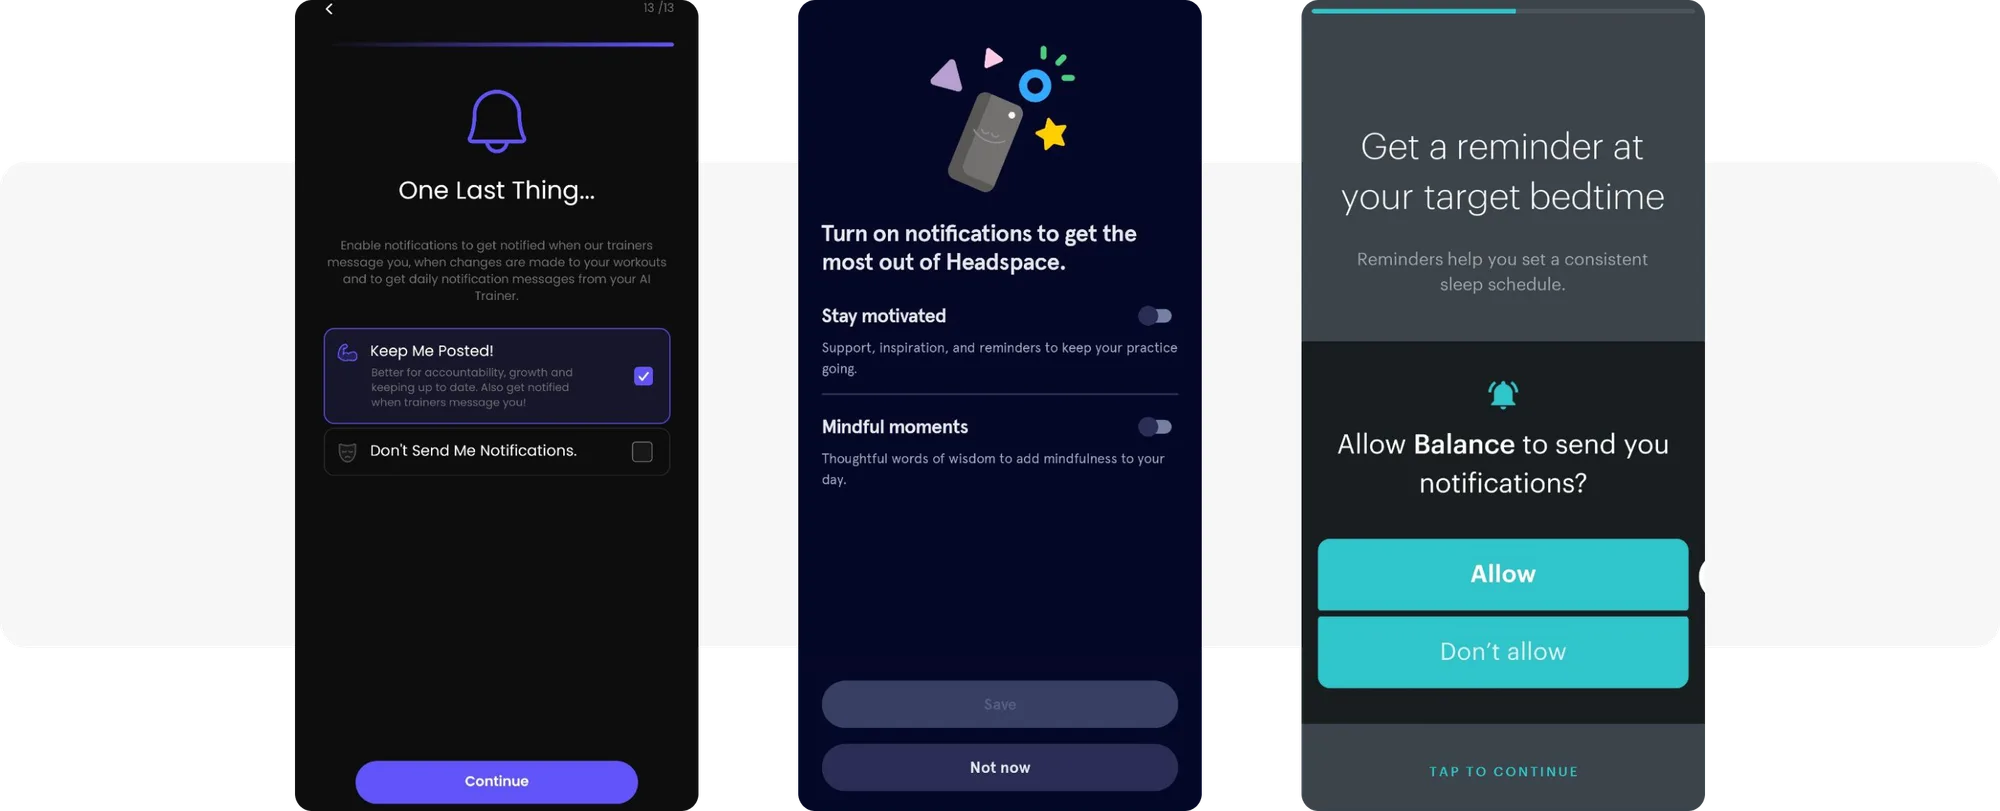
Examples of great opt-in permission request screens: Сoachify.AI**, Headspace, and Balance apps**
To set up an opt-in message, create a Rich Media opt-in prompt in Pushwoosh. Use a ready-made template, upload your HTML, or design a new one with the built-in editor.
Designing opt-in messages in Pushwoosh feels like a breeze!
Don’t bombard users with requests immediately. Instead, use Time Delay in Pushwoosh to let users explore your app on their own first.

Specify a time delay to send an opt-in request at an appropriate moment
🌟Omada used Pushwoosh’s Time Delay feature to branch messaging flows
for users who engage with the app on the first two days after the install on
their own and for those who don’t.
By the end of the personalized onboarding campaign, the app achieved a 67.4%
conversion rate to coupon usage, a 29% retention rate by Day 12, and only 4% of
users remained inactive.
6. A/B/n test your onboarding ideas
Want to know which of your onboarding sequences hit the mark? Run A/B/n tests.
With Pushwoosh, you can check out the effectiveness of all your communications right within its Customer Journey Builder. Before running an experiment, choose Conversion Goals, put the A/B/n Split element onto the canvas, and configure the test.
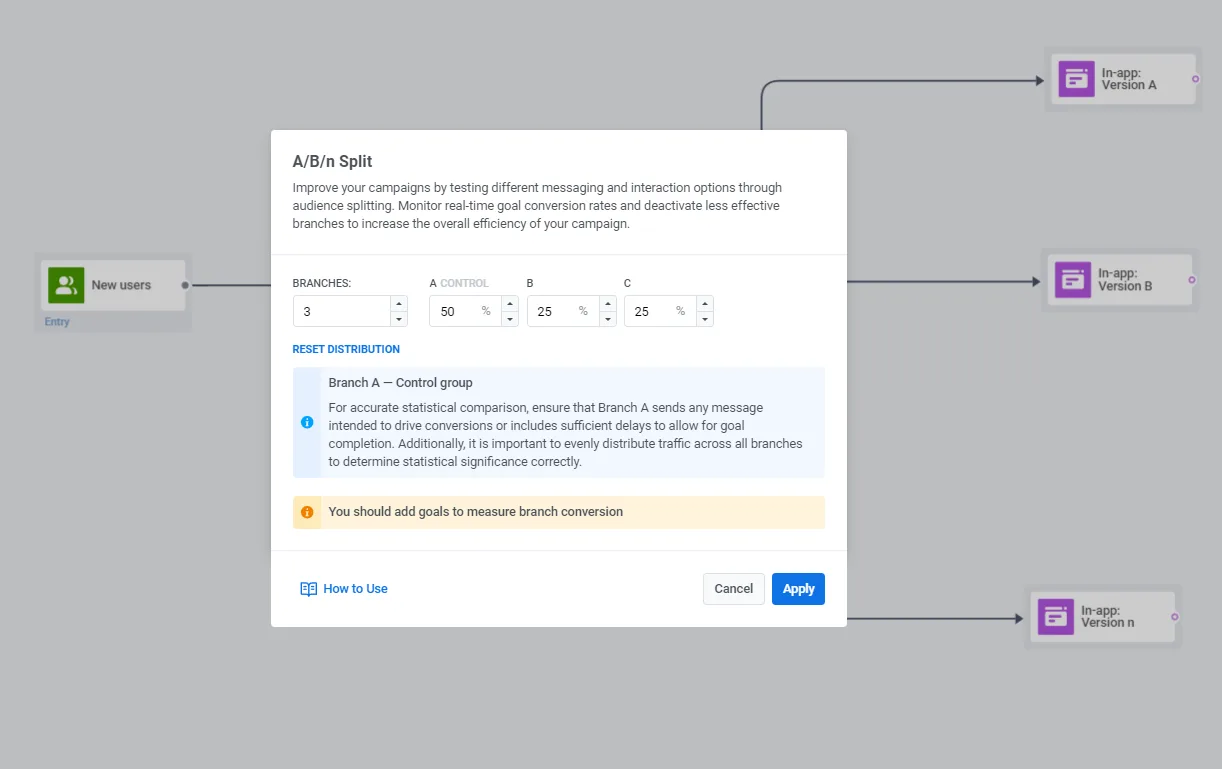
Split the flow into as many test branches as you need
You can keep an eye on stats in real time and see how users are distributed. Look for the branch with the highest conversion. Then deactivate less-performing branches instantly by selecting “Keep only winner” in the test statistics window.
Mind that you need to pause any active journeys before setting up a test in them. Plan out the time for A/B/n testing instead of acting on impulse.
7. Don’t treat onboarding as ‘set-it-and-forget-it’
When it comes to onboarding, don’t just set it and forget it. Think of it as the gateway to ongoing personalization.
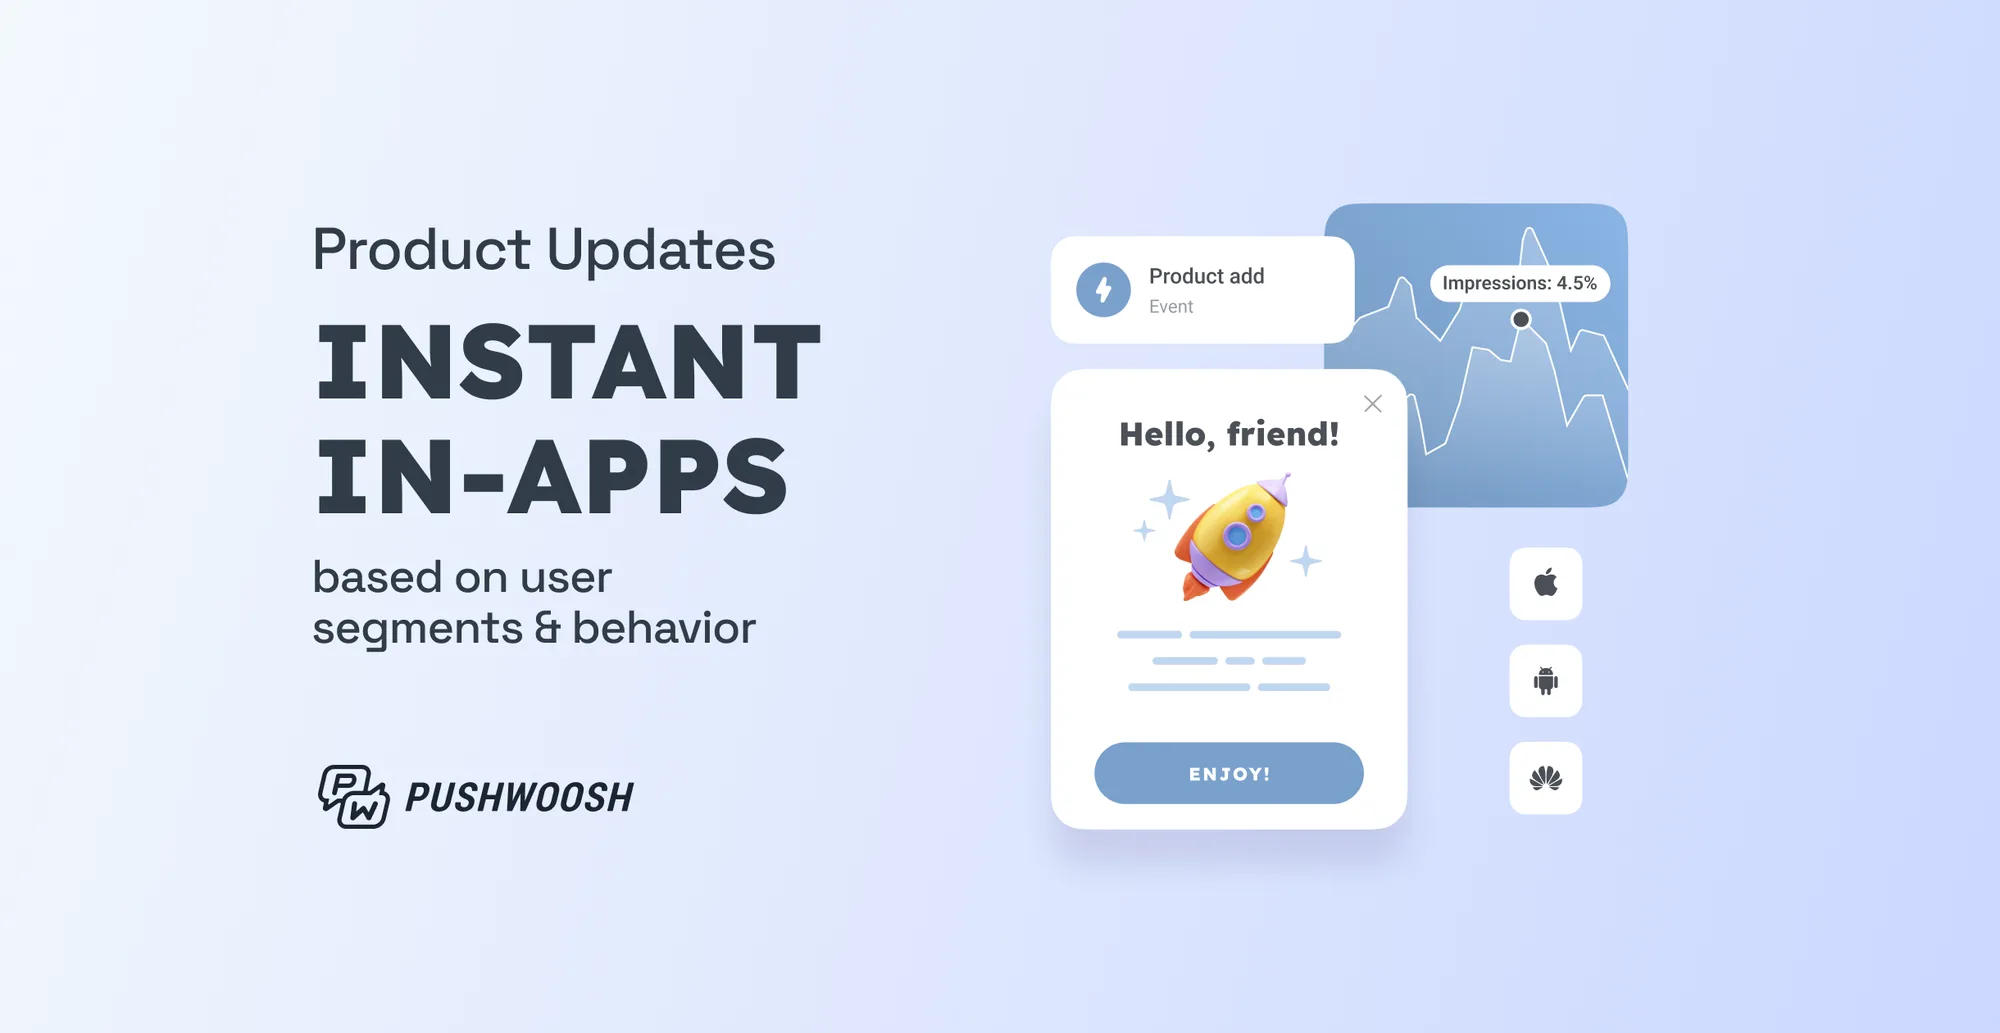
For instance, you can use view notifications about new features a user hasn’t tried yet as part of the personalized onboarding. For this, your app needs to recognize the user’s previous lack of interaction with them.
1️⃣ Set up an API-based entry to start a journey as soon as the new feature is released.
2️⃣ Create a custom event like ‘New Feature Unlocked’ in Pushwoosh to track users who have interacted with a new feature.
3️⃣ For those who haven’t, design an in-app message showcasing this functionality and display it at the user’s next app open.

Such carefully curated in-app hints are a great way to win your users’ hearts and boost retention.
Choose the best CDP for personalized onboarding
Retaining users is simpler when you show them the attention they deserve right from the start. In this case, personalized onboarding is your best bet.
Building, personalizing, and analyzing onboarding flows is much easier when you use a reliable CDP such as Pushwoosh. Get started today to create a seamless and personalized onboarding experience for all your app users!