More May updates landed, just as we promised in vol.1.
Here’s what changed 👇
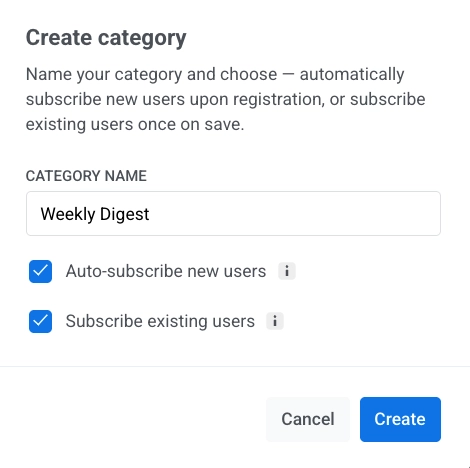
Email subscription categories get easier to manage 📩
In Q1, we shipped a serious email upgrade, including the subscription preference center, so subscribers can pick categories like Newsletter, Promotional, or Product Updates instead of hitting one unsubscribe button. Two operational updates this month make managing those categories noticeably less manual:
✅ Auto-subscribe users when you save a category
When you add a new category in the preference center, you can now toggle Auto-subscribe new users (subscribes anyone who registers from that point on) and Subscribe existing users (subscribes your current base when you save).
What it changes: Adding a new category used to mean a follow-up step — running a tag update or an import, before anyone was actually in it. Now, both happen straight from the category settings.
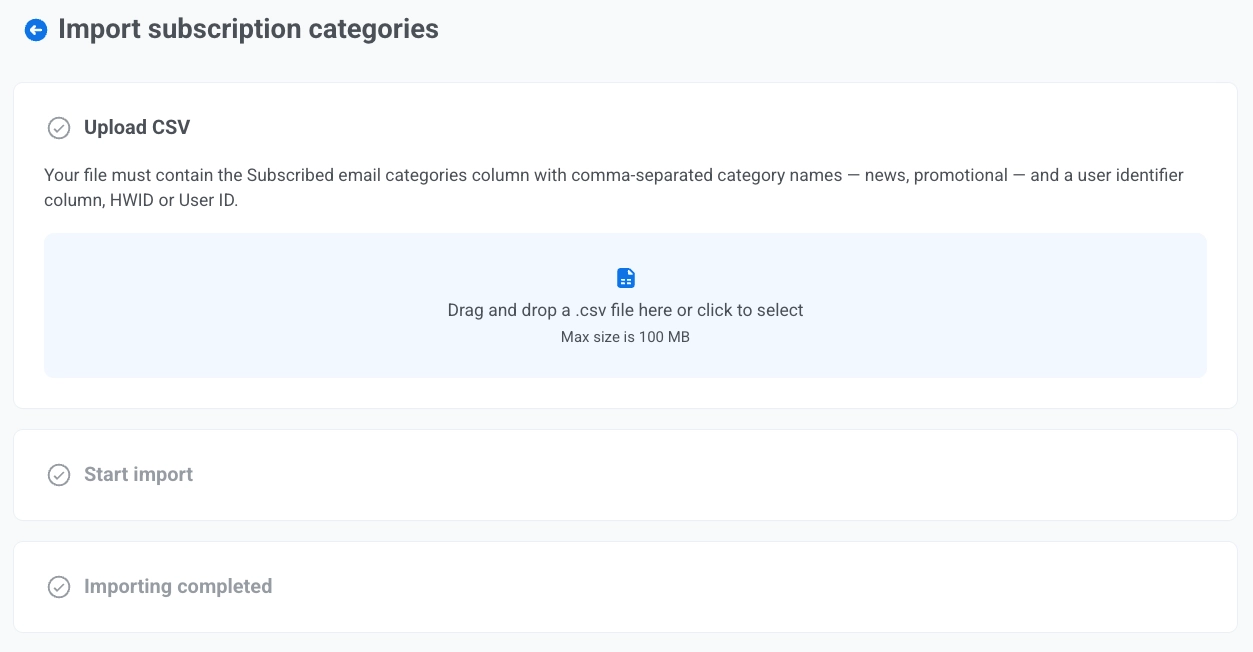
📥 Import subscription categories via CSV
You can now bulk-update the Subscribed Email Categories tag from a CSV file.
What it changes: Migrating preference data from another platform (or applying a one-time correction to a chunk of users) doesn’t need a custom import flow or a developer ticket.
Override email subject & sender per Journey step ✉️
The Email element in Customer Journey Builder now lets you set the subject line and sender details directly on the step, without touching the underlying email preset.
For each Email step, choose:
Subject line — Custom (type a subject that applies only to this step) or From preset (use the preset’s subject, with auto-sync if the preset is updated later).

Sender info — Specify manually (set From Email, From Name, and optionally a reply-to address just for this step) or From preset (inherit and auto-sync).

What it changes: No more cloning a preset just to swap a subject or a sender for one step. Run subject-line A/B tests by putting an A/B/n split before two Email elements and giving each a different custom subject. Route replies to the right team — support@company.com on one step, vip@company.com on another, without duplicating content.
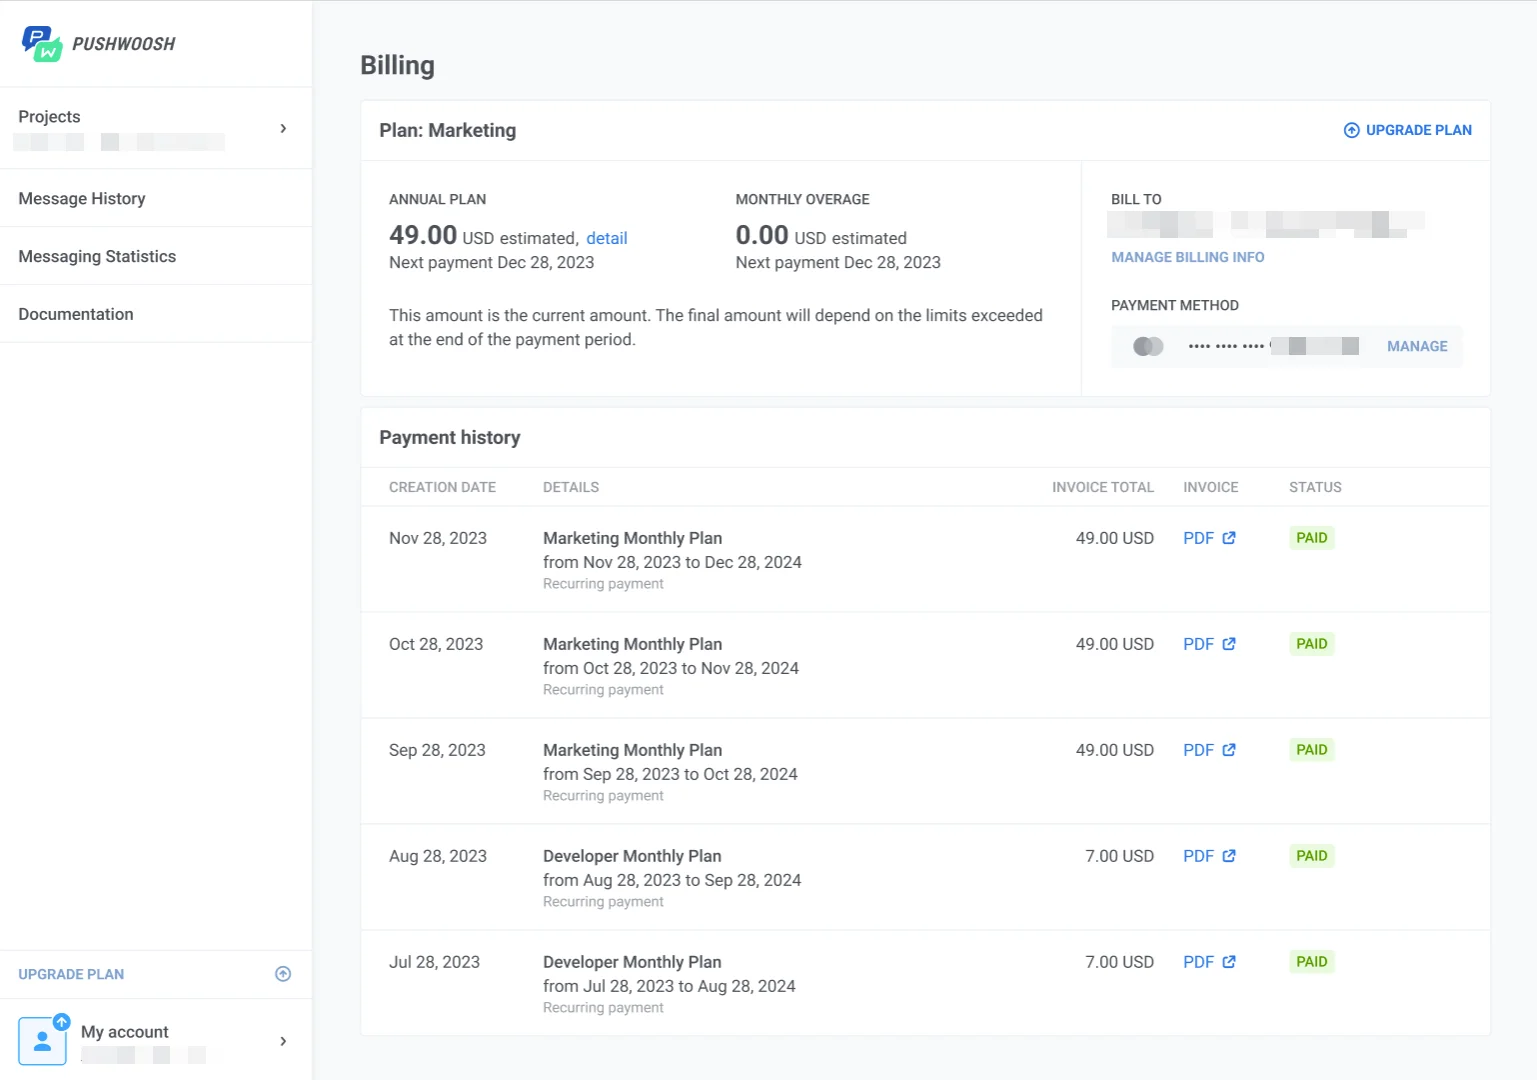
Manage everything billing-related in one place 💳
The Billing page has been redesigned. Plan details, usage, invoices, payment methods, and ManyMoney AI daily request usage live on a single page under My account → Billing.
What it changes: No more clicking between separate screens to check a plan limit, download an invoice, or update a card. Open Billing, and the full picture is there:
- Overview — plan name, billing cycle, next payment date, estimated total for the period, billing contact, MAU, and email send usage against your plan limits, plus ManyMoney AI daily request usage and reset time (it’s available free on every plan now 😎).
- Invoices — billing history with a PDF download for every period.
- Payment methods — cards and PayPal, with the default clearly marked.
Try the updates yourself
Every feature above is live and ready to use in your account.
For the full list of what shipped recently, check our release notes.
Related articles
View all