Stop setting up every template from scratch.
Every email that needs its colors, fonts, and logo rebuilt by hand costs your team time. Multiply that by every campaign, and it adds up fast.
Set your brand up once in Pushwoosh, and that work goes away. Your team gets those hours back for the campaigns themselves, including the tests that never made it out of the backlog.
Here are 4 ways to automate email and in-app design with Pushwoosh’s Brand book.
What goes into your brand kit
In Pushwoosh, your brand kit lives in the Brand book. It holds 4 things:
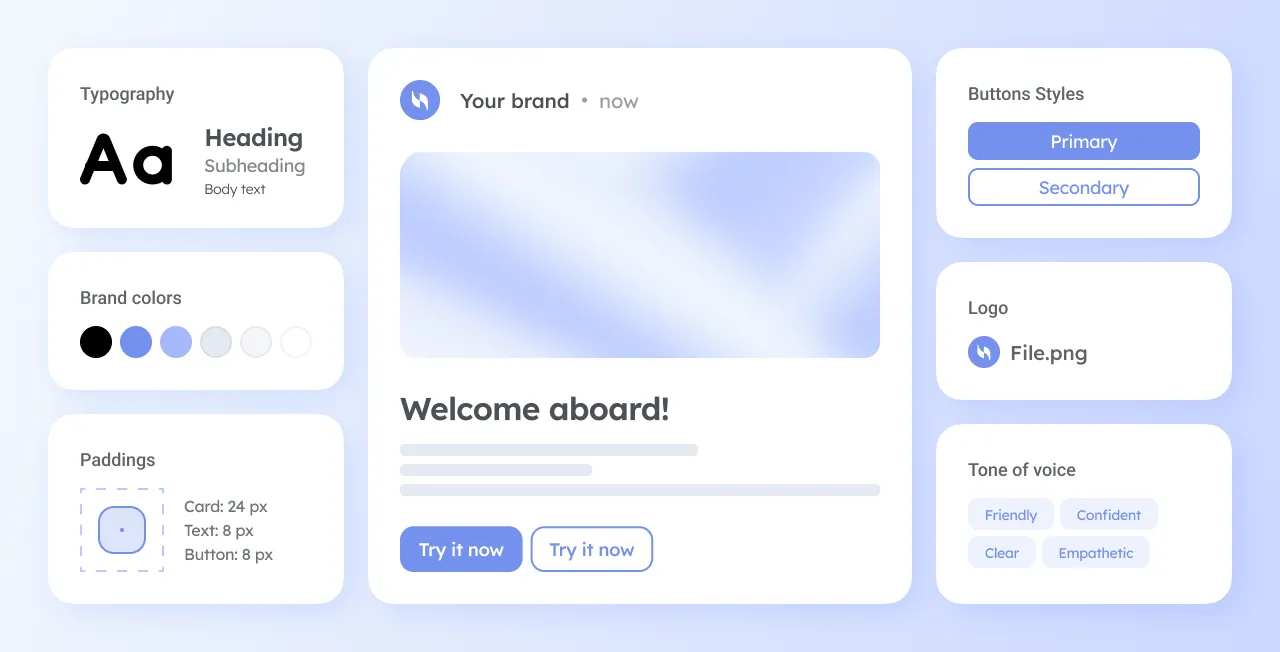
- Logo. Your main logo, plus a separate version for dark mode, so Apple Mail and Outlook don’t turn it into a dark smudge.
- Colors and fonts. The palette and typefaces every template starts from.
- Block defaults. How buttons, spacing, the logo header, and the footer look by default.
- Brand voice. A couple of sentences on how your brand talks to customers. This is the part AI reads when it writes for you.
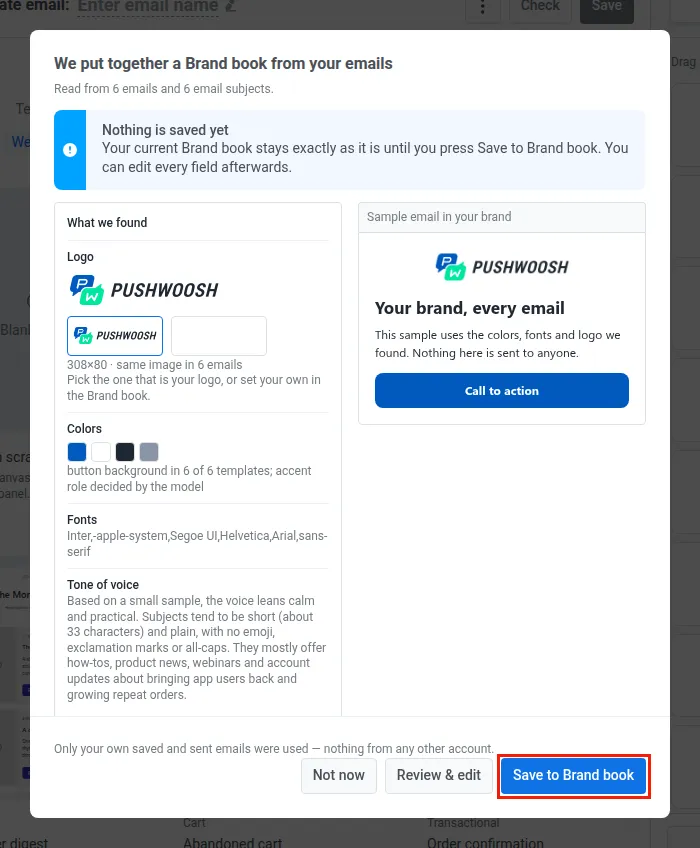
Already have emails in Pushwoosh? Then your brand kit may be waiting for you. Pushwoosh’s AI assistant reads your existing emails and builds your brand kit. All that’s left is to check it and save.
More on that → Option 4: accept the brand kit Pushwoosh builds from your emails
Where to begin: Pick your starting point
Each option below builds the same brand kit from a different starting point. Pick the one that matches what you already have and skip the rest.
| You have… | Your option |
|---|---|
| Nothing yet, or you want full control | Option 1: Set it up by hand |
| A website | Option 2: Scan your website |
| A brand guide (PDF, image, or text) | Option 3: Derive your brand from a file |
| Emails you've already sent from Pushwoosh | 🌟 Option 4: Accept the brand kit Pushwoosh builds from your emails: your colors, fonts, logo, and tone, ready to save & use (fastest!) |
Built emails in Pushwoosh before? Skip the setup: AI assistant have already collected your brand from them. See Option 4.
Option 1: Set it up by hand
Best for: a new brand or a team that wants to decide every detail itself.
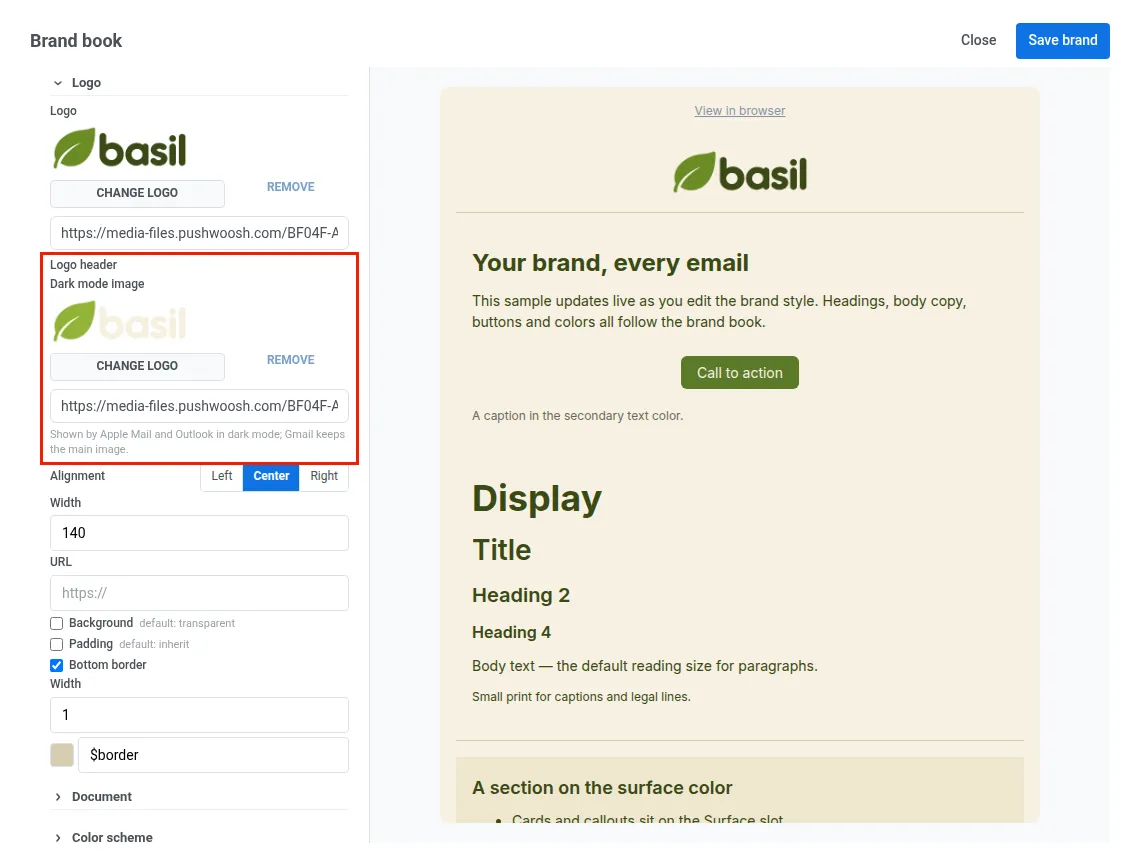
How it works: Pick your logo from Media storage or paste a hosted image URL. Open the Logo header settings to add a dark mode image and set alignment, width, padding, and a bottom border. Then fine-tune colors, fonts, and block defaults, and write your brand voice in the Brand voice field.
Good to know: Two or three lines of Brand voice are enough. For example: “Short sentences. Warm, a little cheeky. Talk about the food first, discounts second. Never use all caps.”
Option 2: Scan your website
Best for: brands whose website already reflects the current brand.
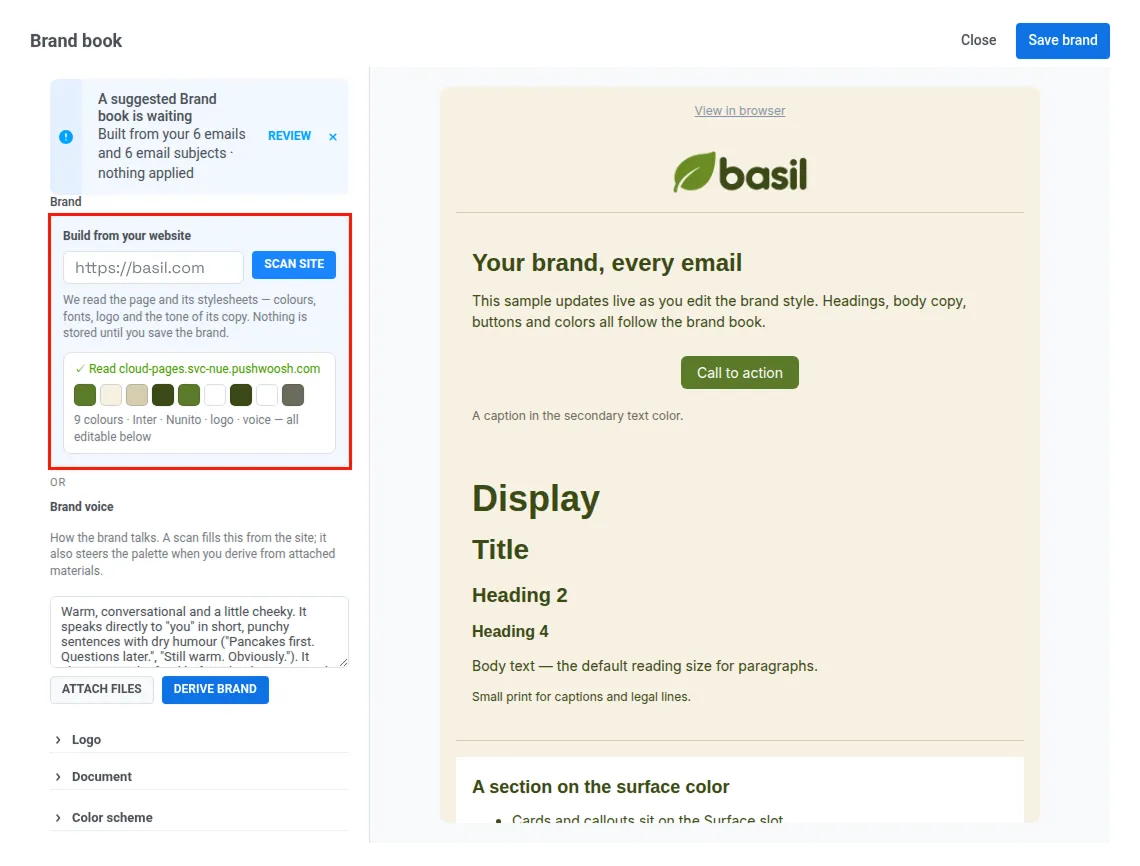
How it works: Enter your domain in Build from your website and click Scan site. Pushwoosh reads the page and its stylesheets and fills in your palette and fonts. If the site has them, it also picks up your logo and the tone of your copy for Brand voice. Nothing is saved until you click Save brand, so review everything first.
Good to know: If your homepage is light on text, the scan also reads your About, Story, or Blog page for the tone. And if your site sits behind anti-bot protection like Cloudflare, the scan stops with an error and your settings stay untouched. Then set the style by hand (Option 1) or let AI derive it from your brand guide (Option 3).
Option 3: Derive your brand from a PDF
Best for: brands with a guide in PDF, a logo, or just a few lines describing the brand. Already have email templates in Pushwoosh? Option 4 may do this for you.
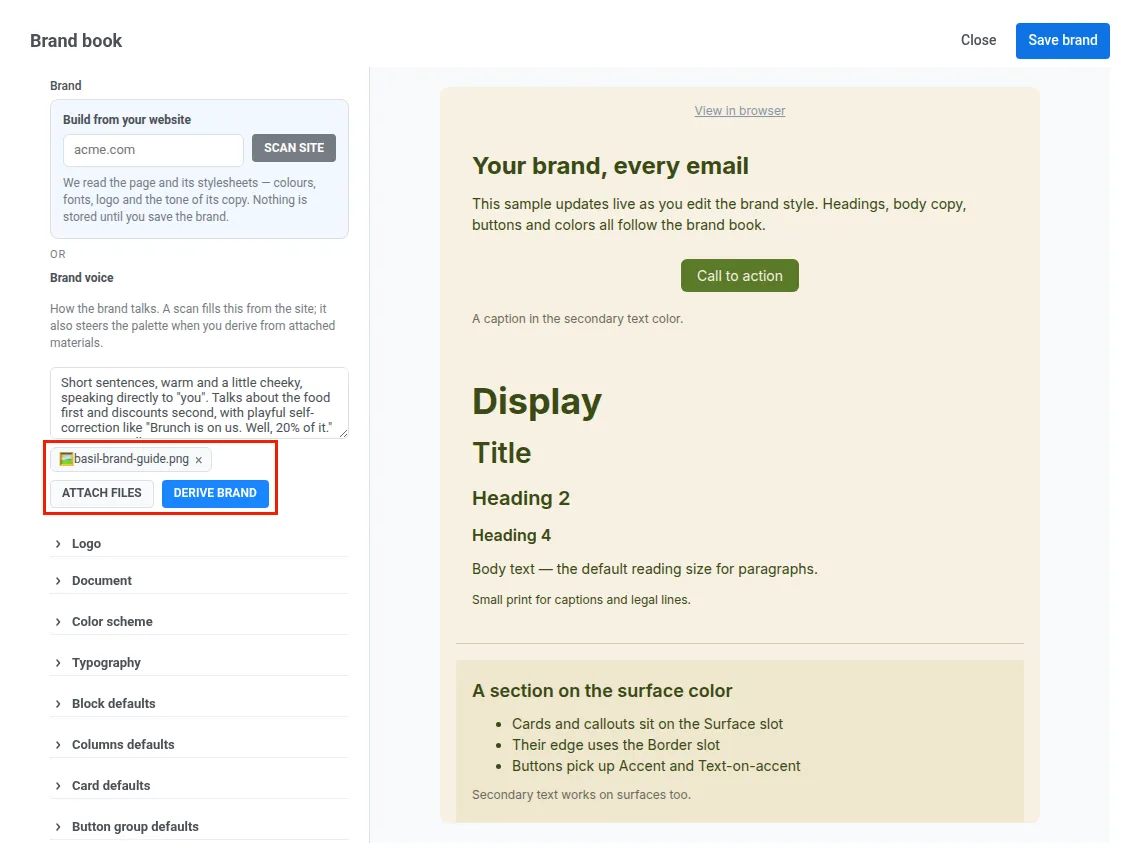
How it works: Click Attach files, add one file (a brand-book PDF, an image, or a web or text file), and click Derive brand. AI reads the file and builds a palette, fonts, and brand voice from it. If you skip the file, Pushwoosh uses your current logo as the source.
Option 4 🌟 (fastest): accept the brand kit Pushwoosh builds from your emails
Most brand kit tools start with a blank form or a URL. Pushwoosh starts with the emails you already have. If your app has a few email templates, the kit may be waiting for you.
Best for: any app that has already sent emails through Pushwoosh.
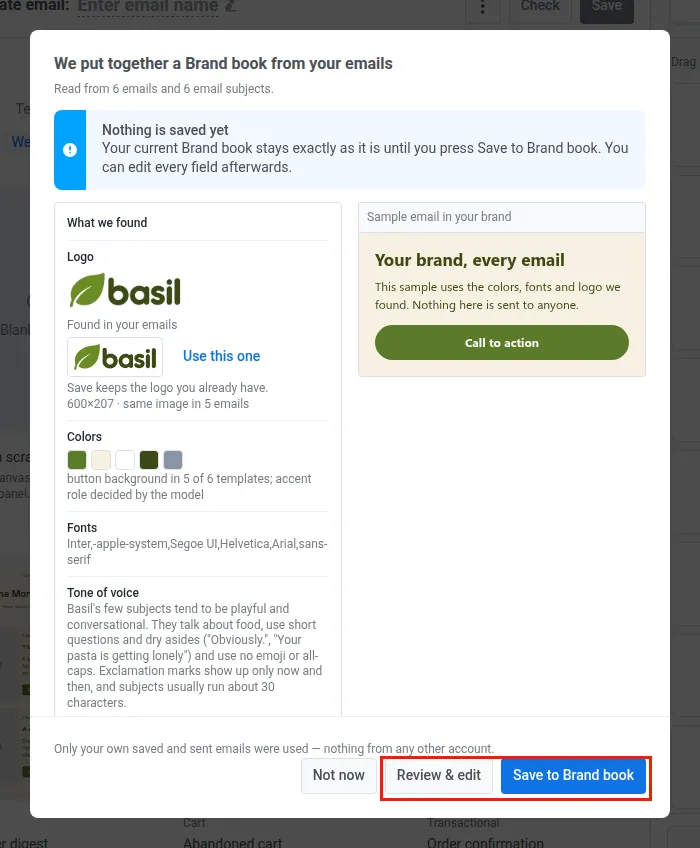
How it works: Pushwoosh looks through your email templates for the style they share: colors, fonts, and logo. It reads the tone of voice from the subjects of the emails you’ve sent. Then it offers you a ready brand kit when you open the email, in-app, or cloud page editor, and shows how many emails and email subjects it read. Click Save to Brand book, and your brand kit is done. To adjust something first, click Review & edit, and the kit opens in the Brand book form.
Your data stays yours: the kit is built only from your own saved and sent emails, never from another account.
“This is our own know-how: Pushwoosh learns your brand from emails your team has already made and sent. That means the kit is built on a style that’s already proven in real campaigns. You confirm it in one click and get back to the work.”

See it in action: how to launch a campaign with your ready-made brand kit
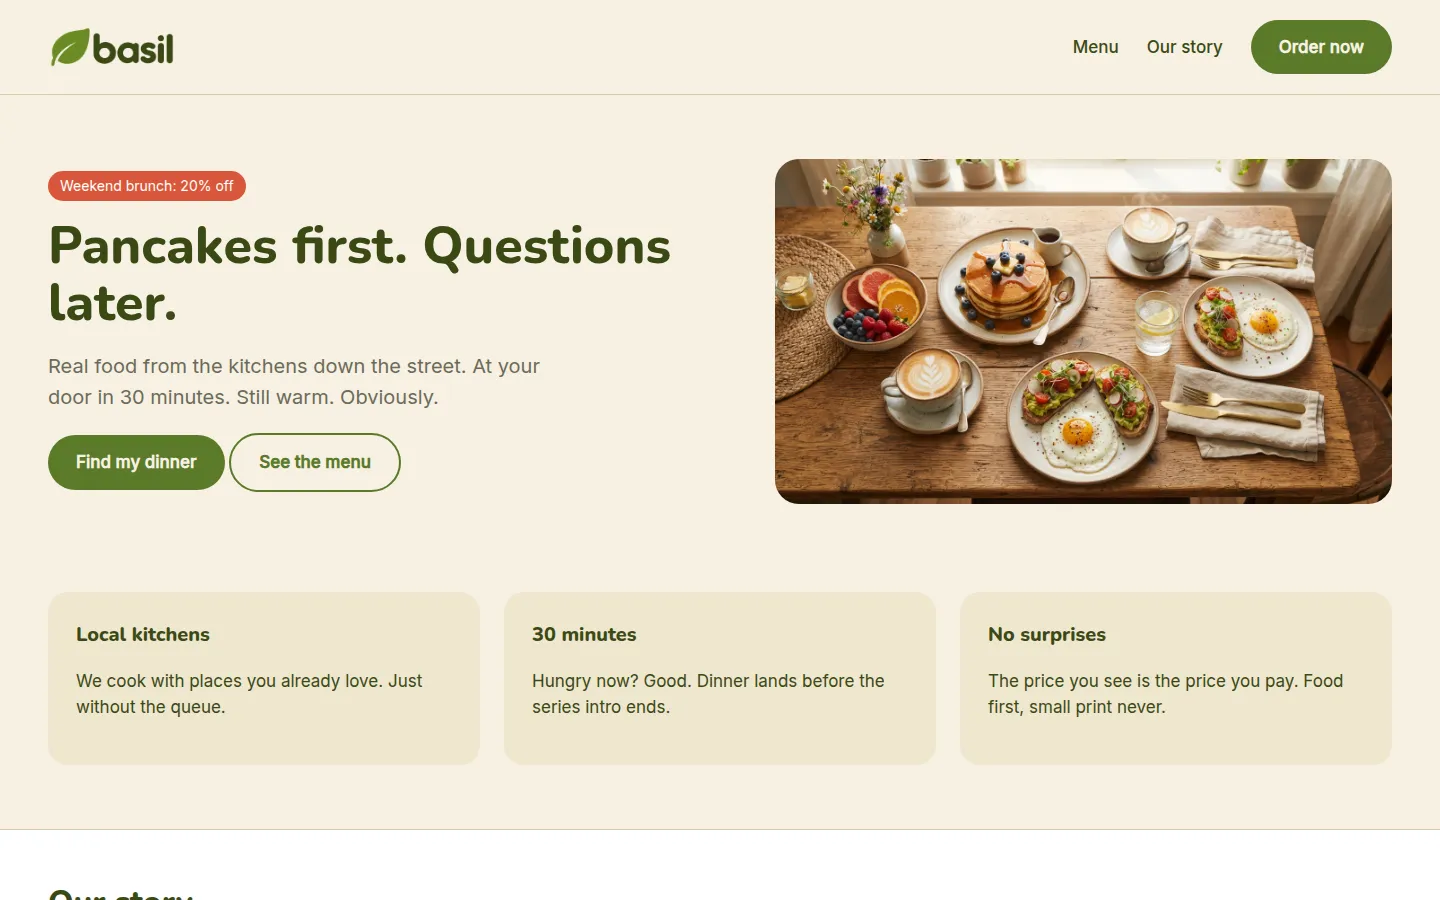
Meet Basil, a food delivery app. Olive-green buttons, a warm cream background, and a friendly, slightly cheeky voice.
Basil’s team accepted the brand kit Pushwoosh built from their sent emails (Option 4) and reviewed the voice before saving.
Now they’re launching a weekend brunch deal in email and in-app.
-
Accept the kit
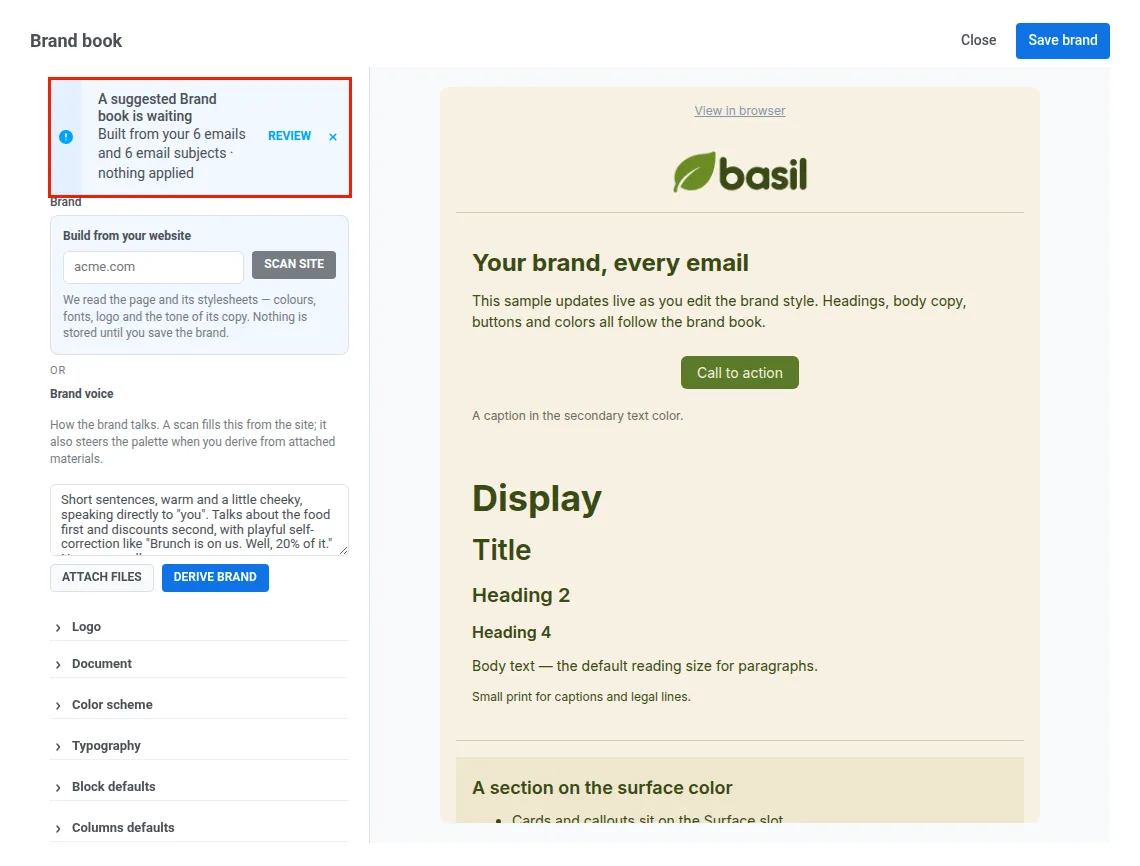
When the team opens the email editor, Pushwoosh offers a ready kit built from Basil's emails. They check the colors, fonts, logo, and tone, then click Save to Brand book. If they open the Brand book from Content → Email Content instead, the same kit waits there as a banner: they click Review, adjust the fields, and click Save brand.
-
Generate the email
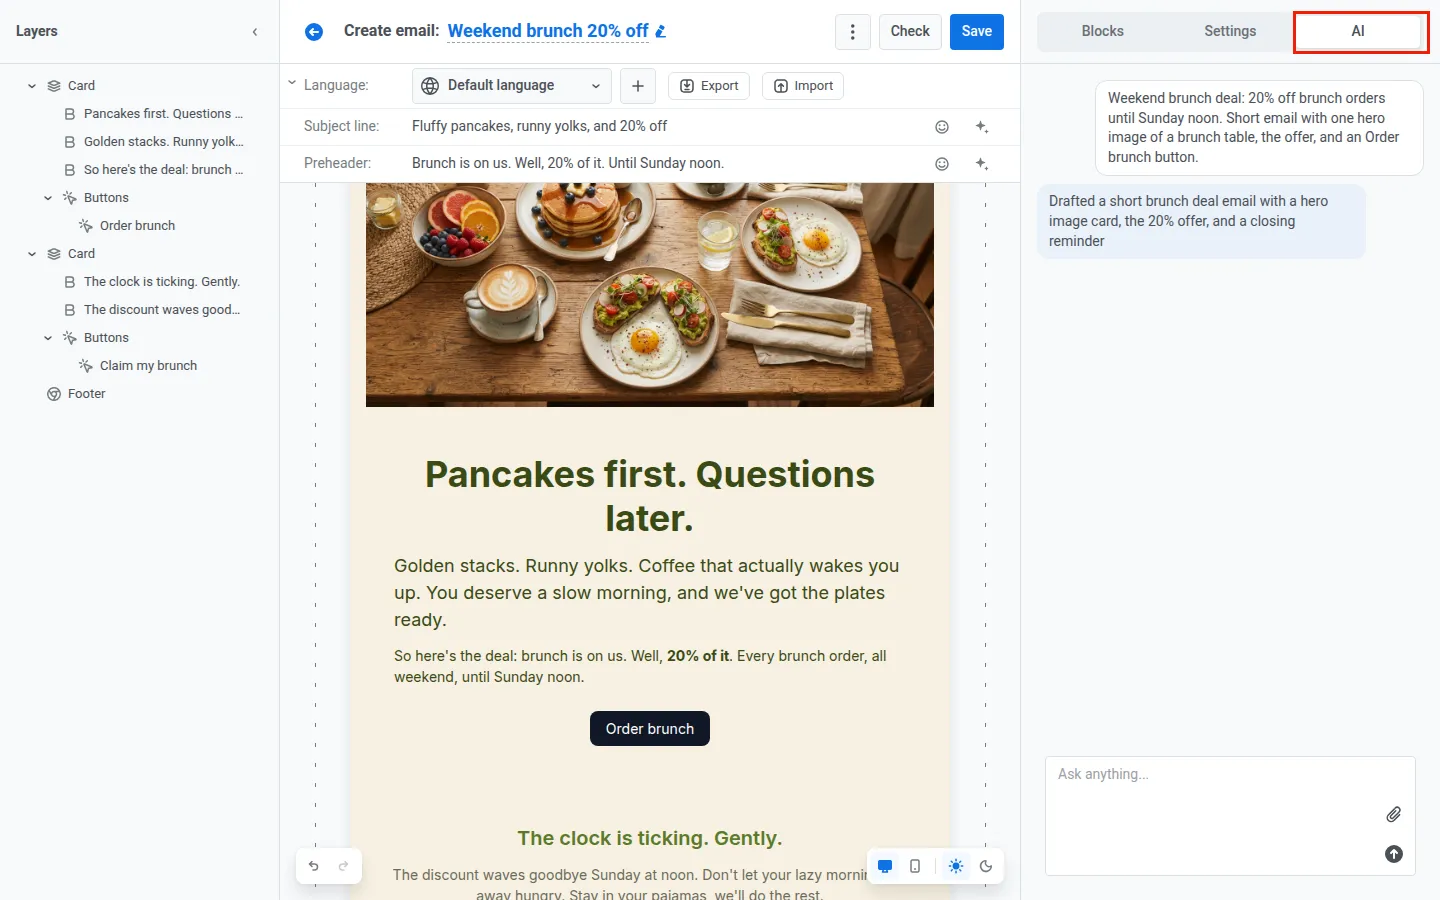
In the email editor, the team opens the AI tab and describes the offer. The first draft already looks and sounds like Basil: brand fonts and palette, the logo in the footer, and the voice: "Brunch is on us. Well, 20% of it. Until Sunday noon."
-
Match the in-app
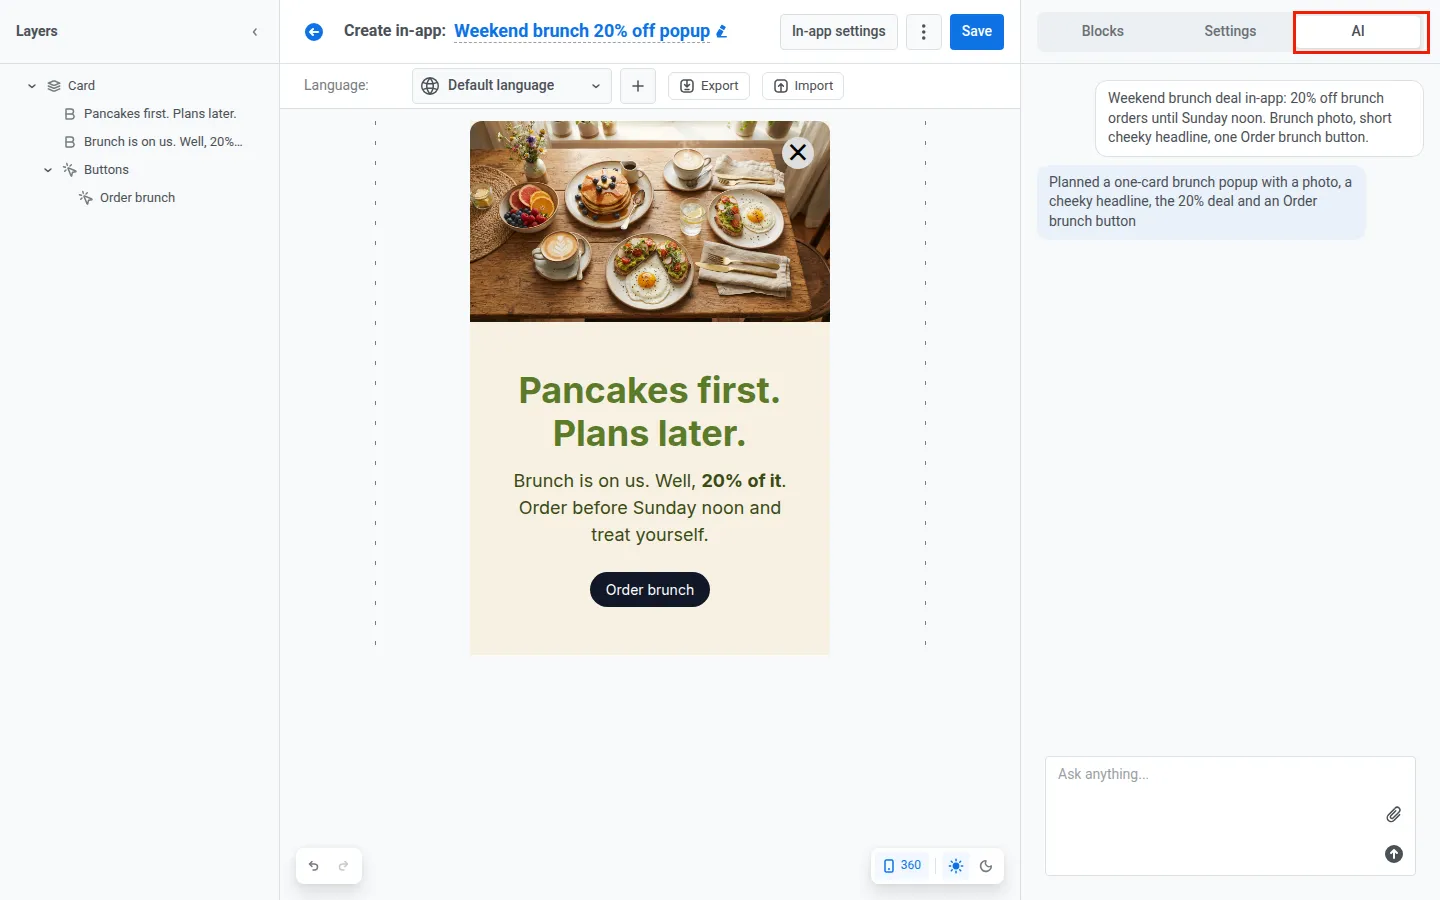
The in-app for the same deal comes from the AI tab of the in-app editor. Same palette and fonts, same voice, with no extra step.
-
Fix last year's template
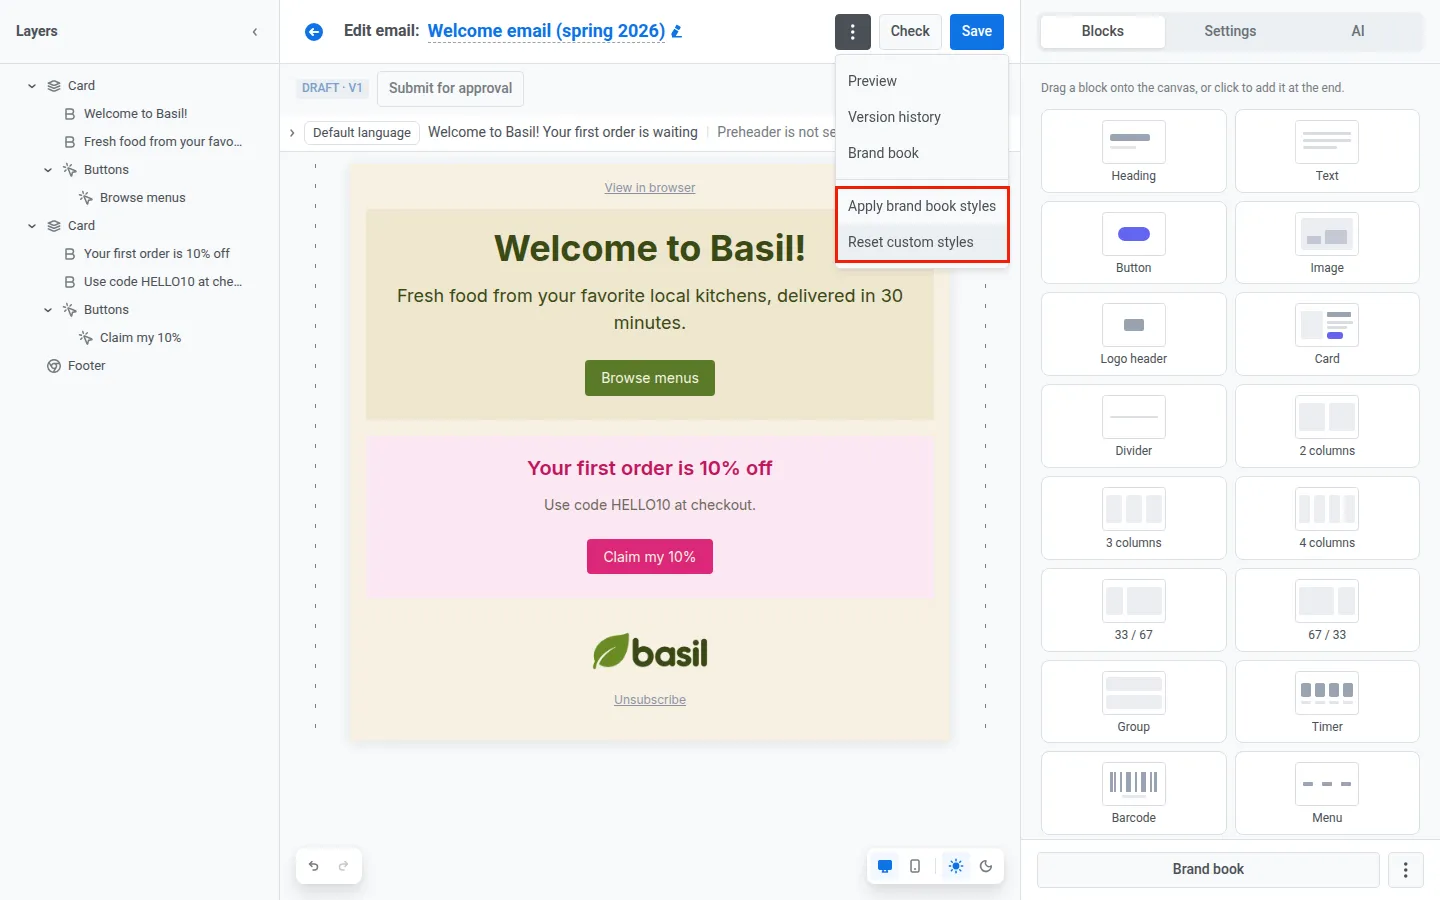
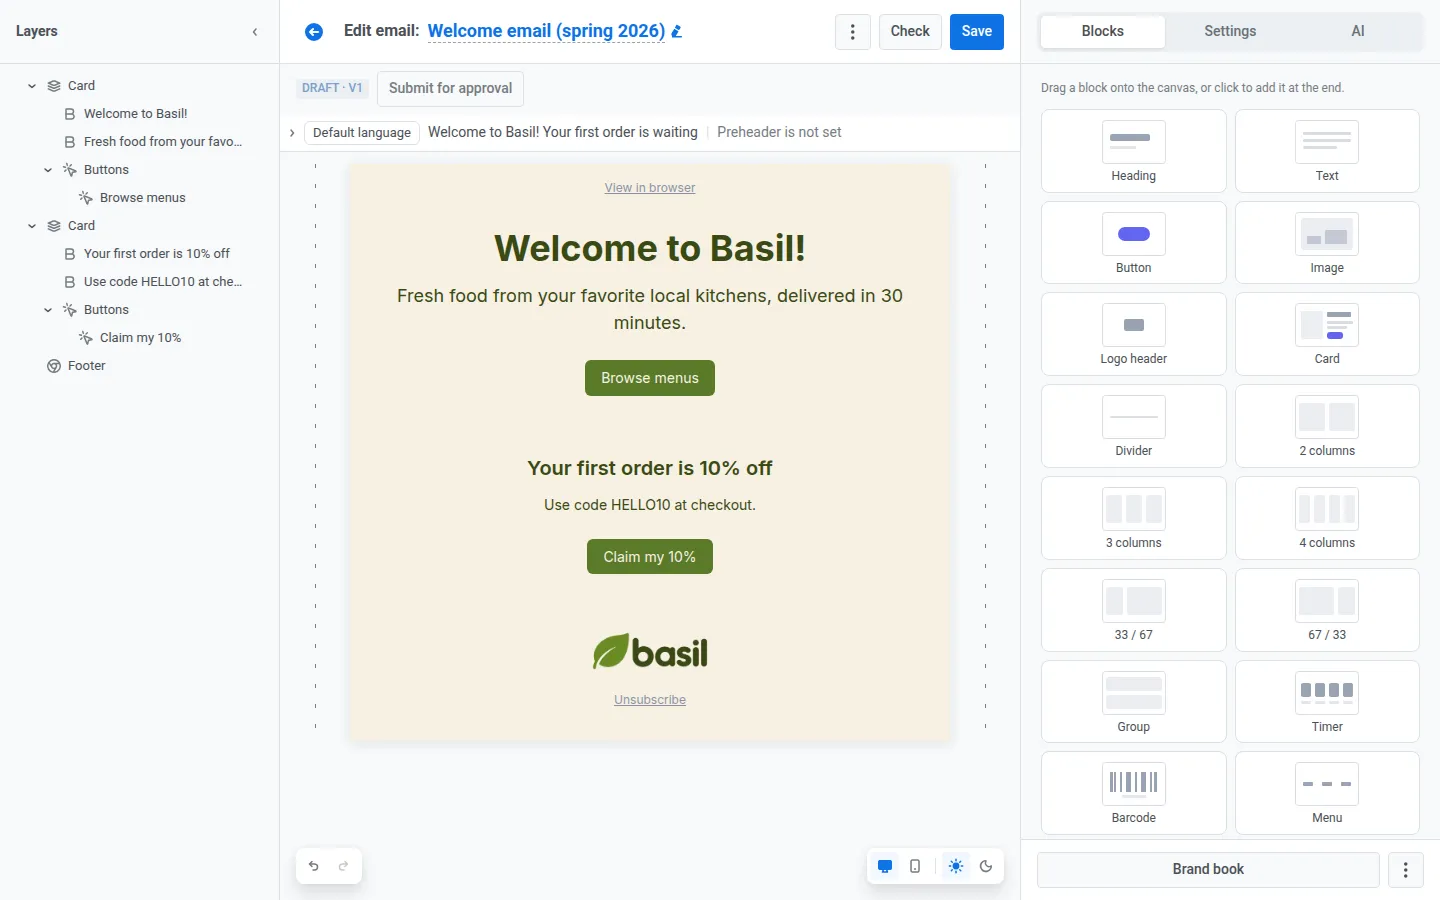
The welcome email from last spring drifted from the brand. In the ⋮ menu, they click Apply brand book styles: the colors from the old palette and the fonts switch to Basil's. A few blocks still keep colors someone picked by hand, so Reset custom styles removes those overrides. Content and layout stay put.
-
Update once
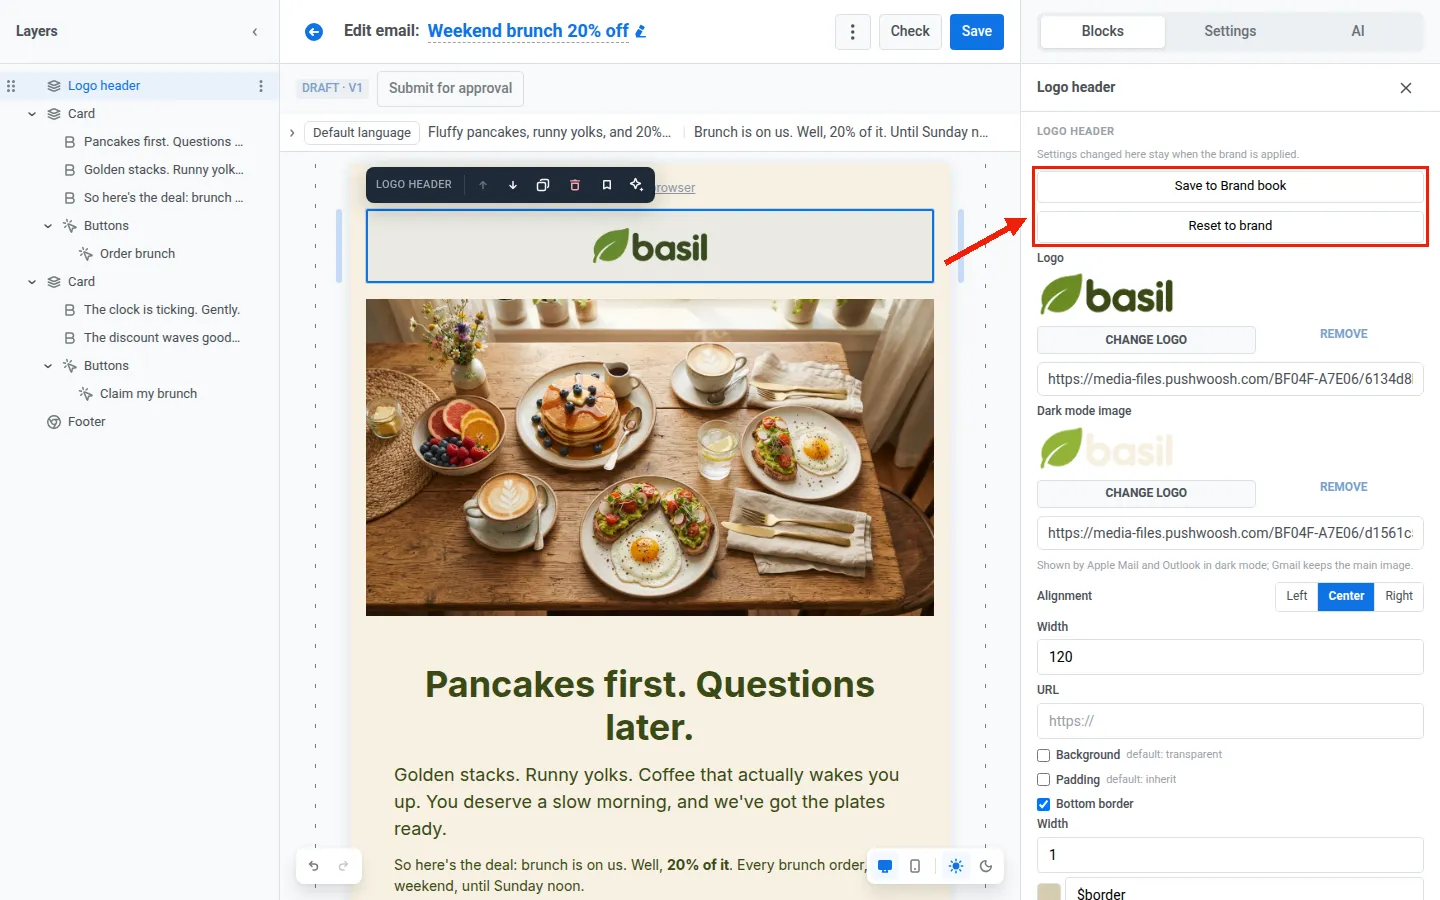
The team tweaks the logo header on the canvas and clicks Save to Brand book on that header. Every logo header picks up the new look the next time the brand is applied, except for fields someone edited by hand on a specific header.
Before: copy hex codes from the last campaign, hunt for the right font, nudge the logo into place, rewrite the copy “in our tone.” Then do it all again for the in-app.
After: accept the kit once. Then describe the offer and send, in both channels.
The result: the brunch deal went out in email and in-app the same day, and nobody had to fix the design by hand.
📖 Read more: Email design best practices: how to build standout emails block by block
🤖 Let AI assistant write in your brand voice
Colors and fonts make a message look like you. Brand voice makes it sound like you.
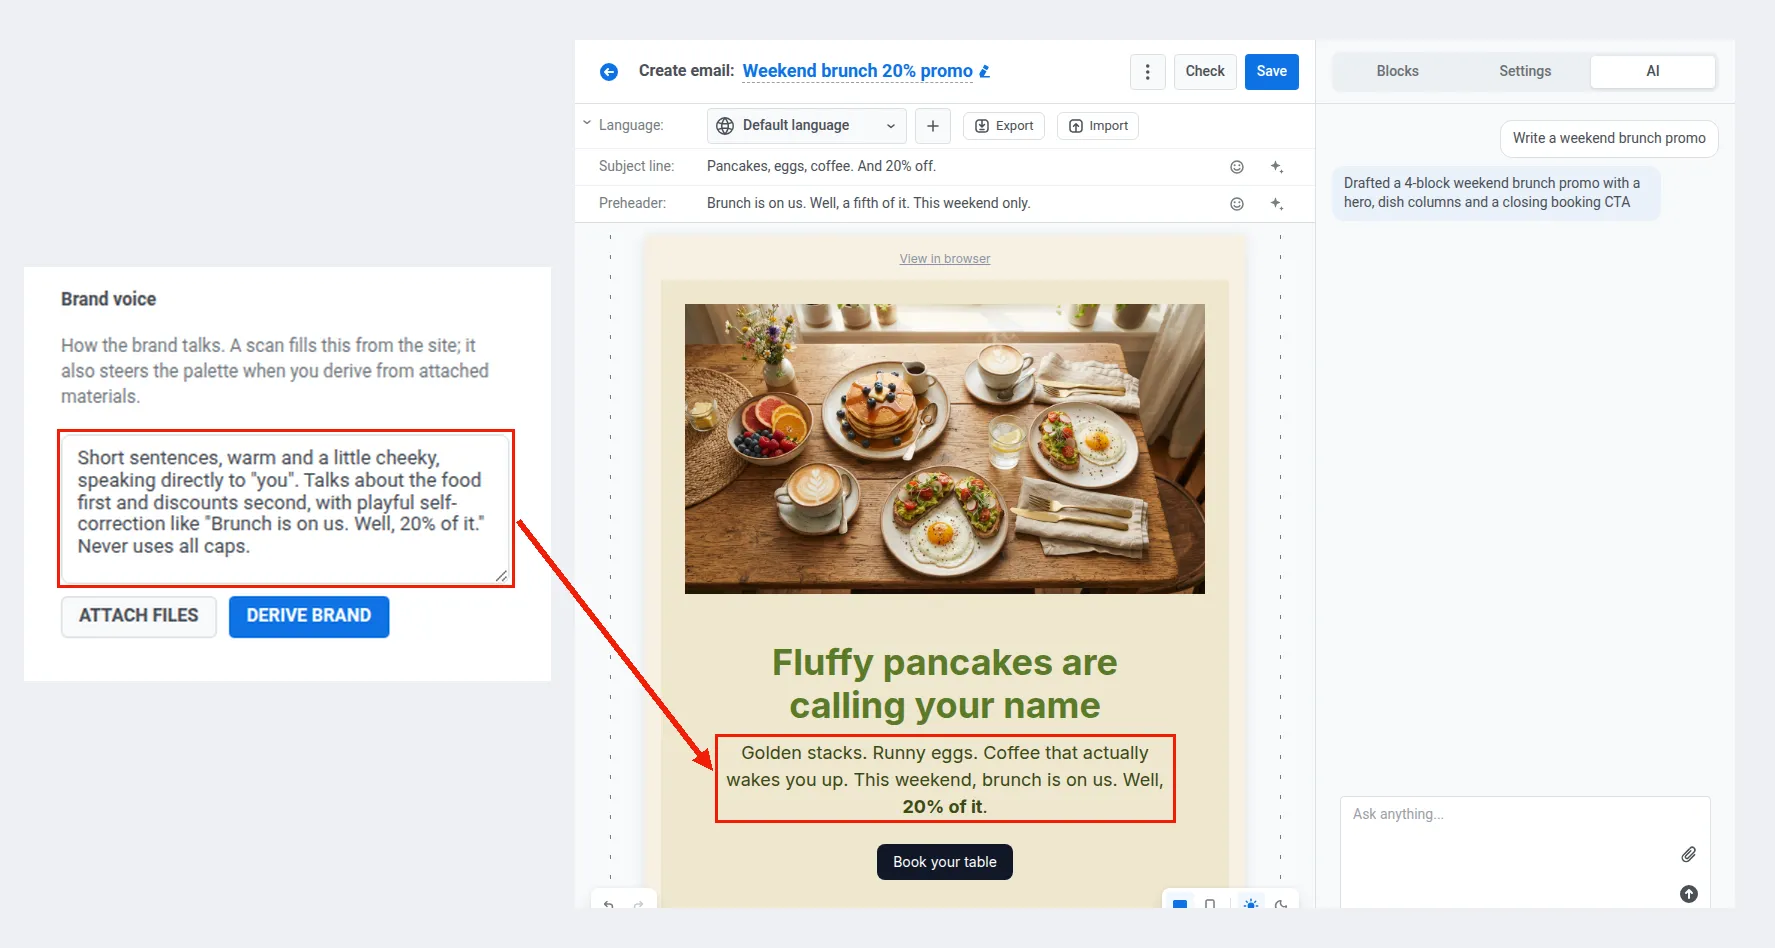
When you set up your Brand book, AI picks up your tone of voice along with your colors and fonts: from your emails, your website, or your brand guide. Then it writes every new email and in-app in that tone.
Put your brand on every message with Pushwoosh
Start from what you have: a blank form, your website, your brand guide, or the emails you already have. Save the kit once. Then generate on-brand emails and in-apps, and stop rebuilding your brand for every campaign.